
Patient fully diagnosed and engine overhaul in progress.
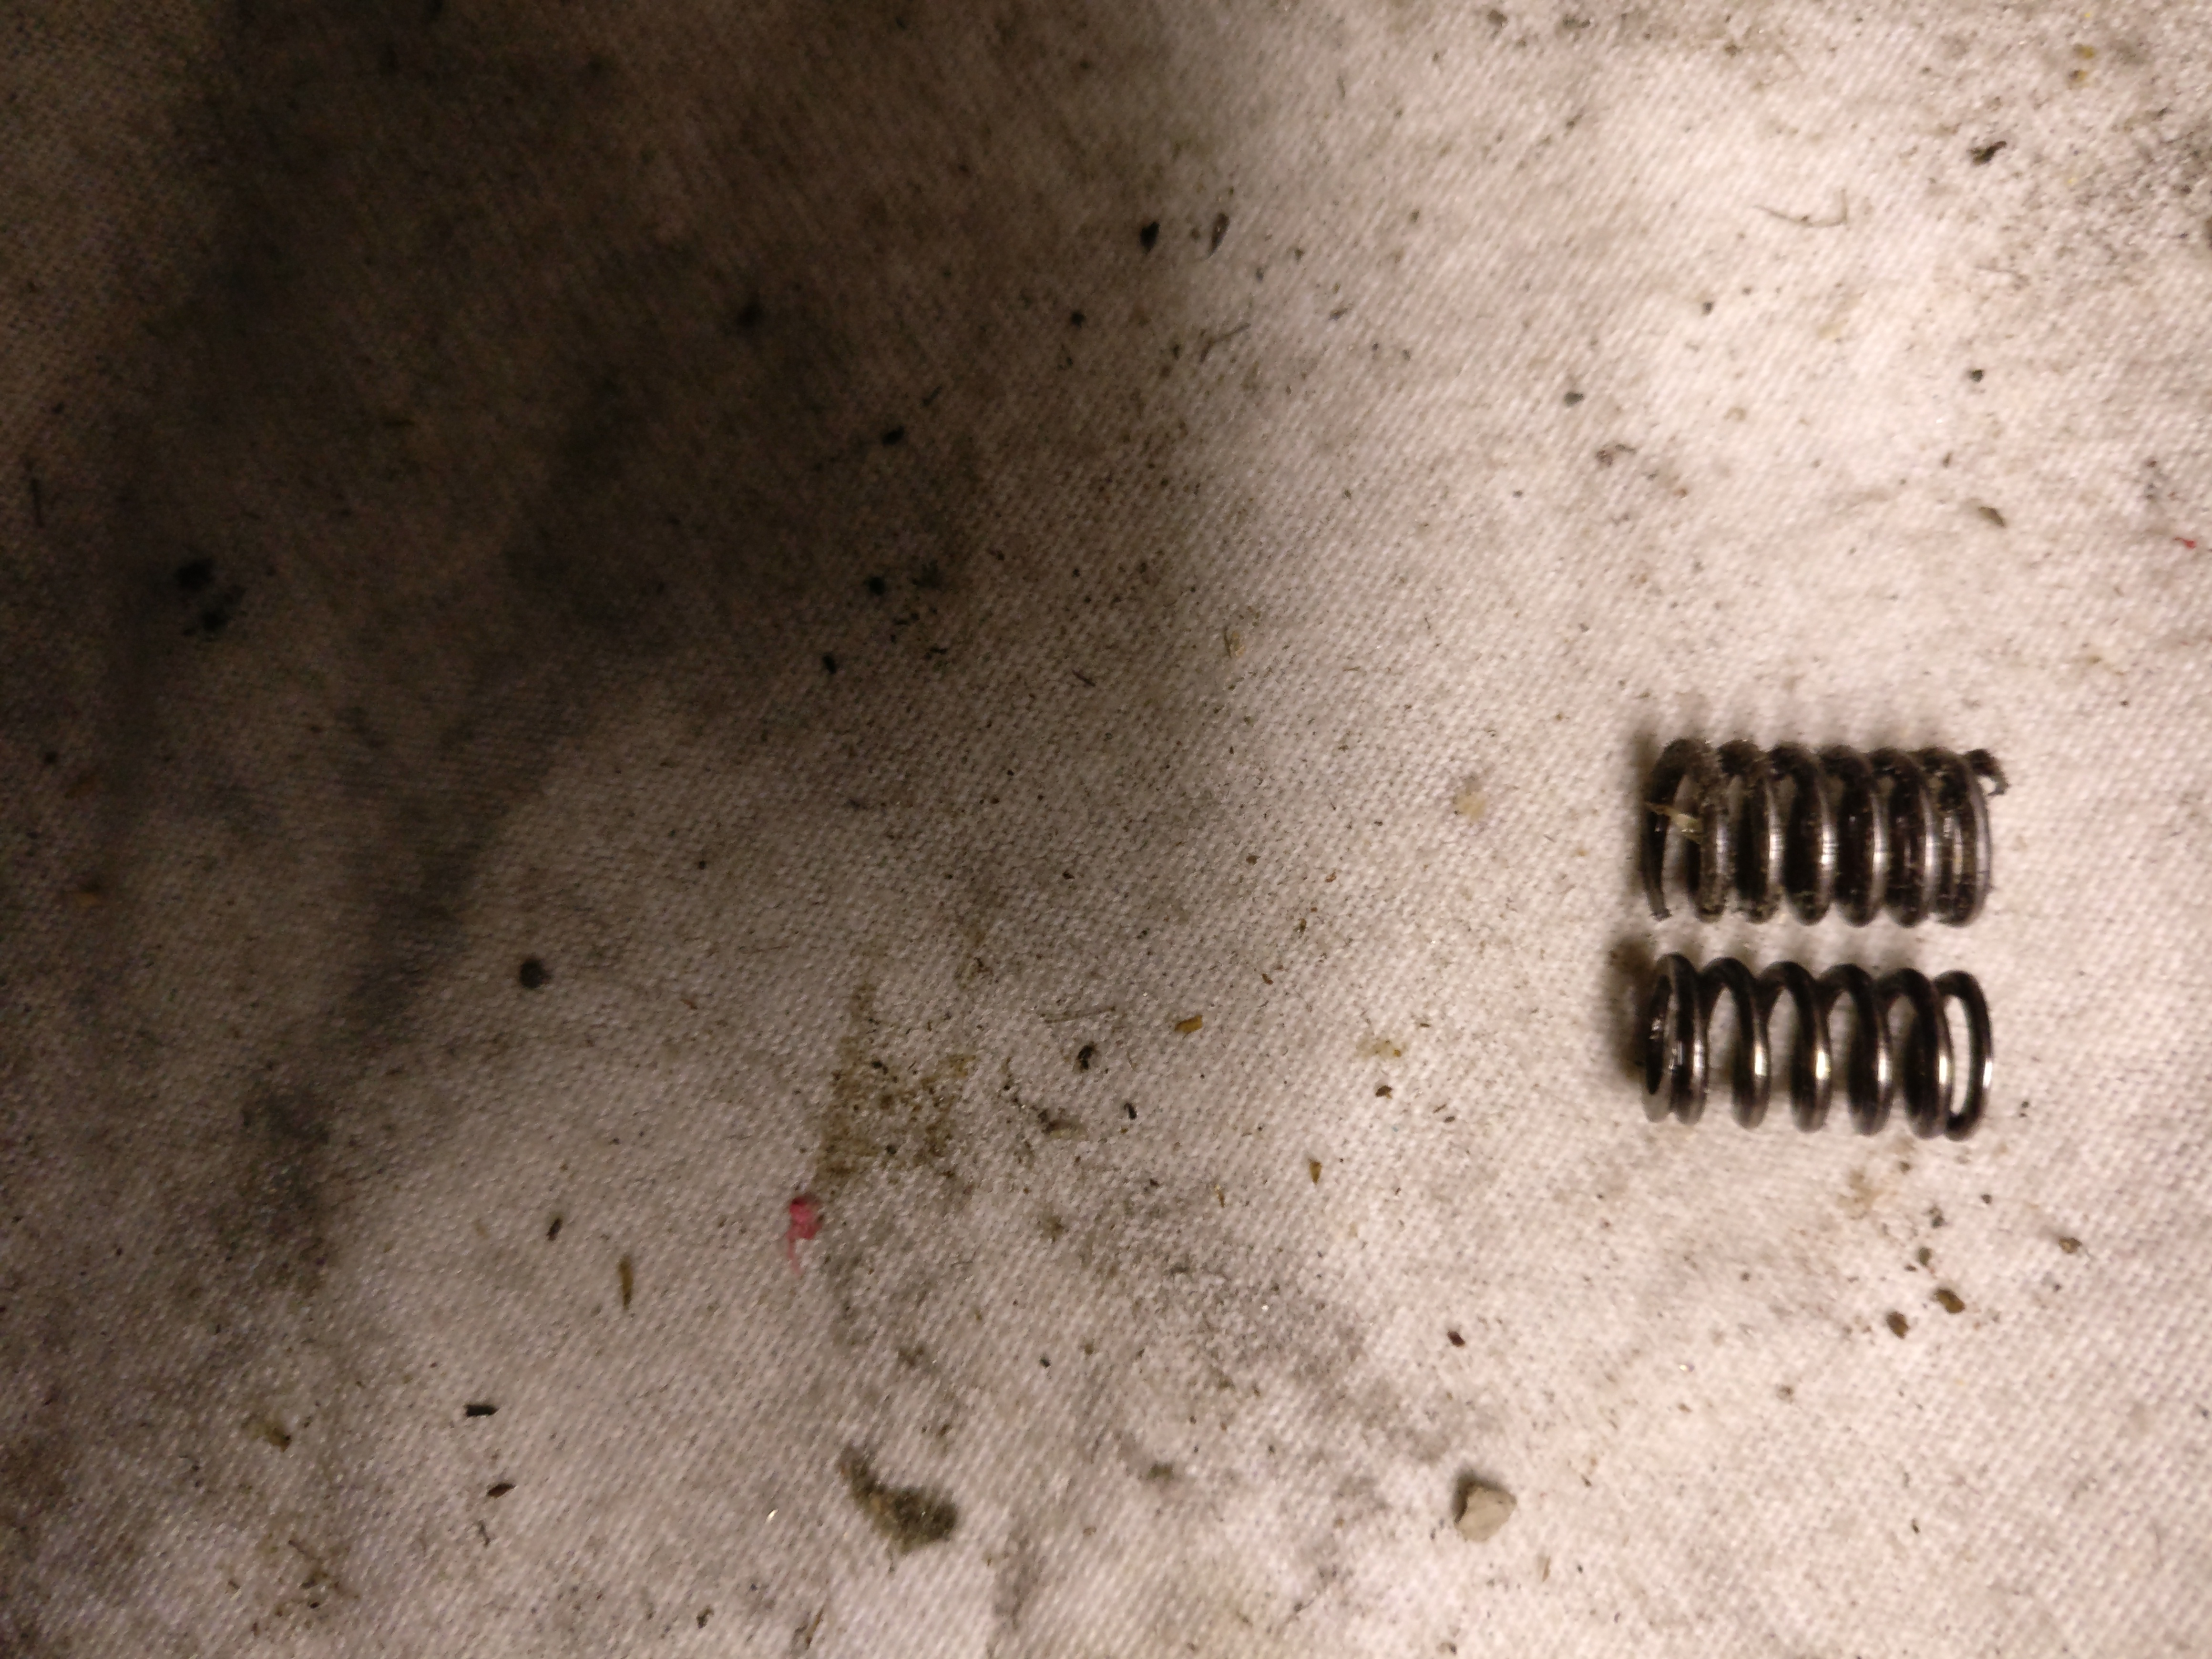
Lay shaft
The R204 engine had a two spring two through hole 4 ball layshaft. These were discontinued after the 201 series, so is a replacement. This was replaced with a two springs, one through hole, 3 ball layshaft. We’re looking into stronger springs for the balls:
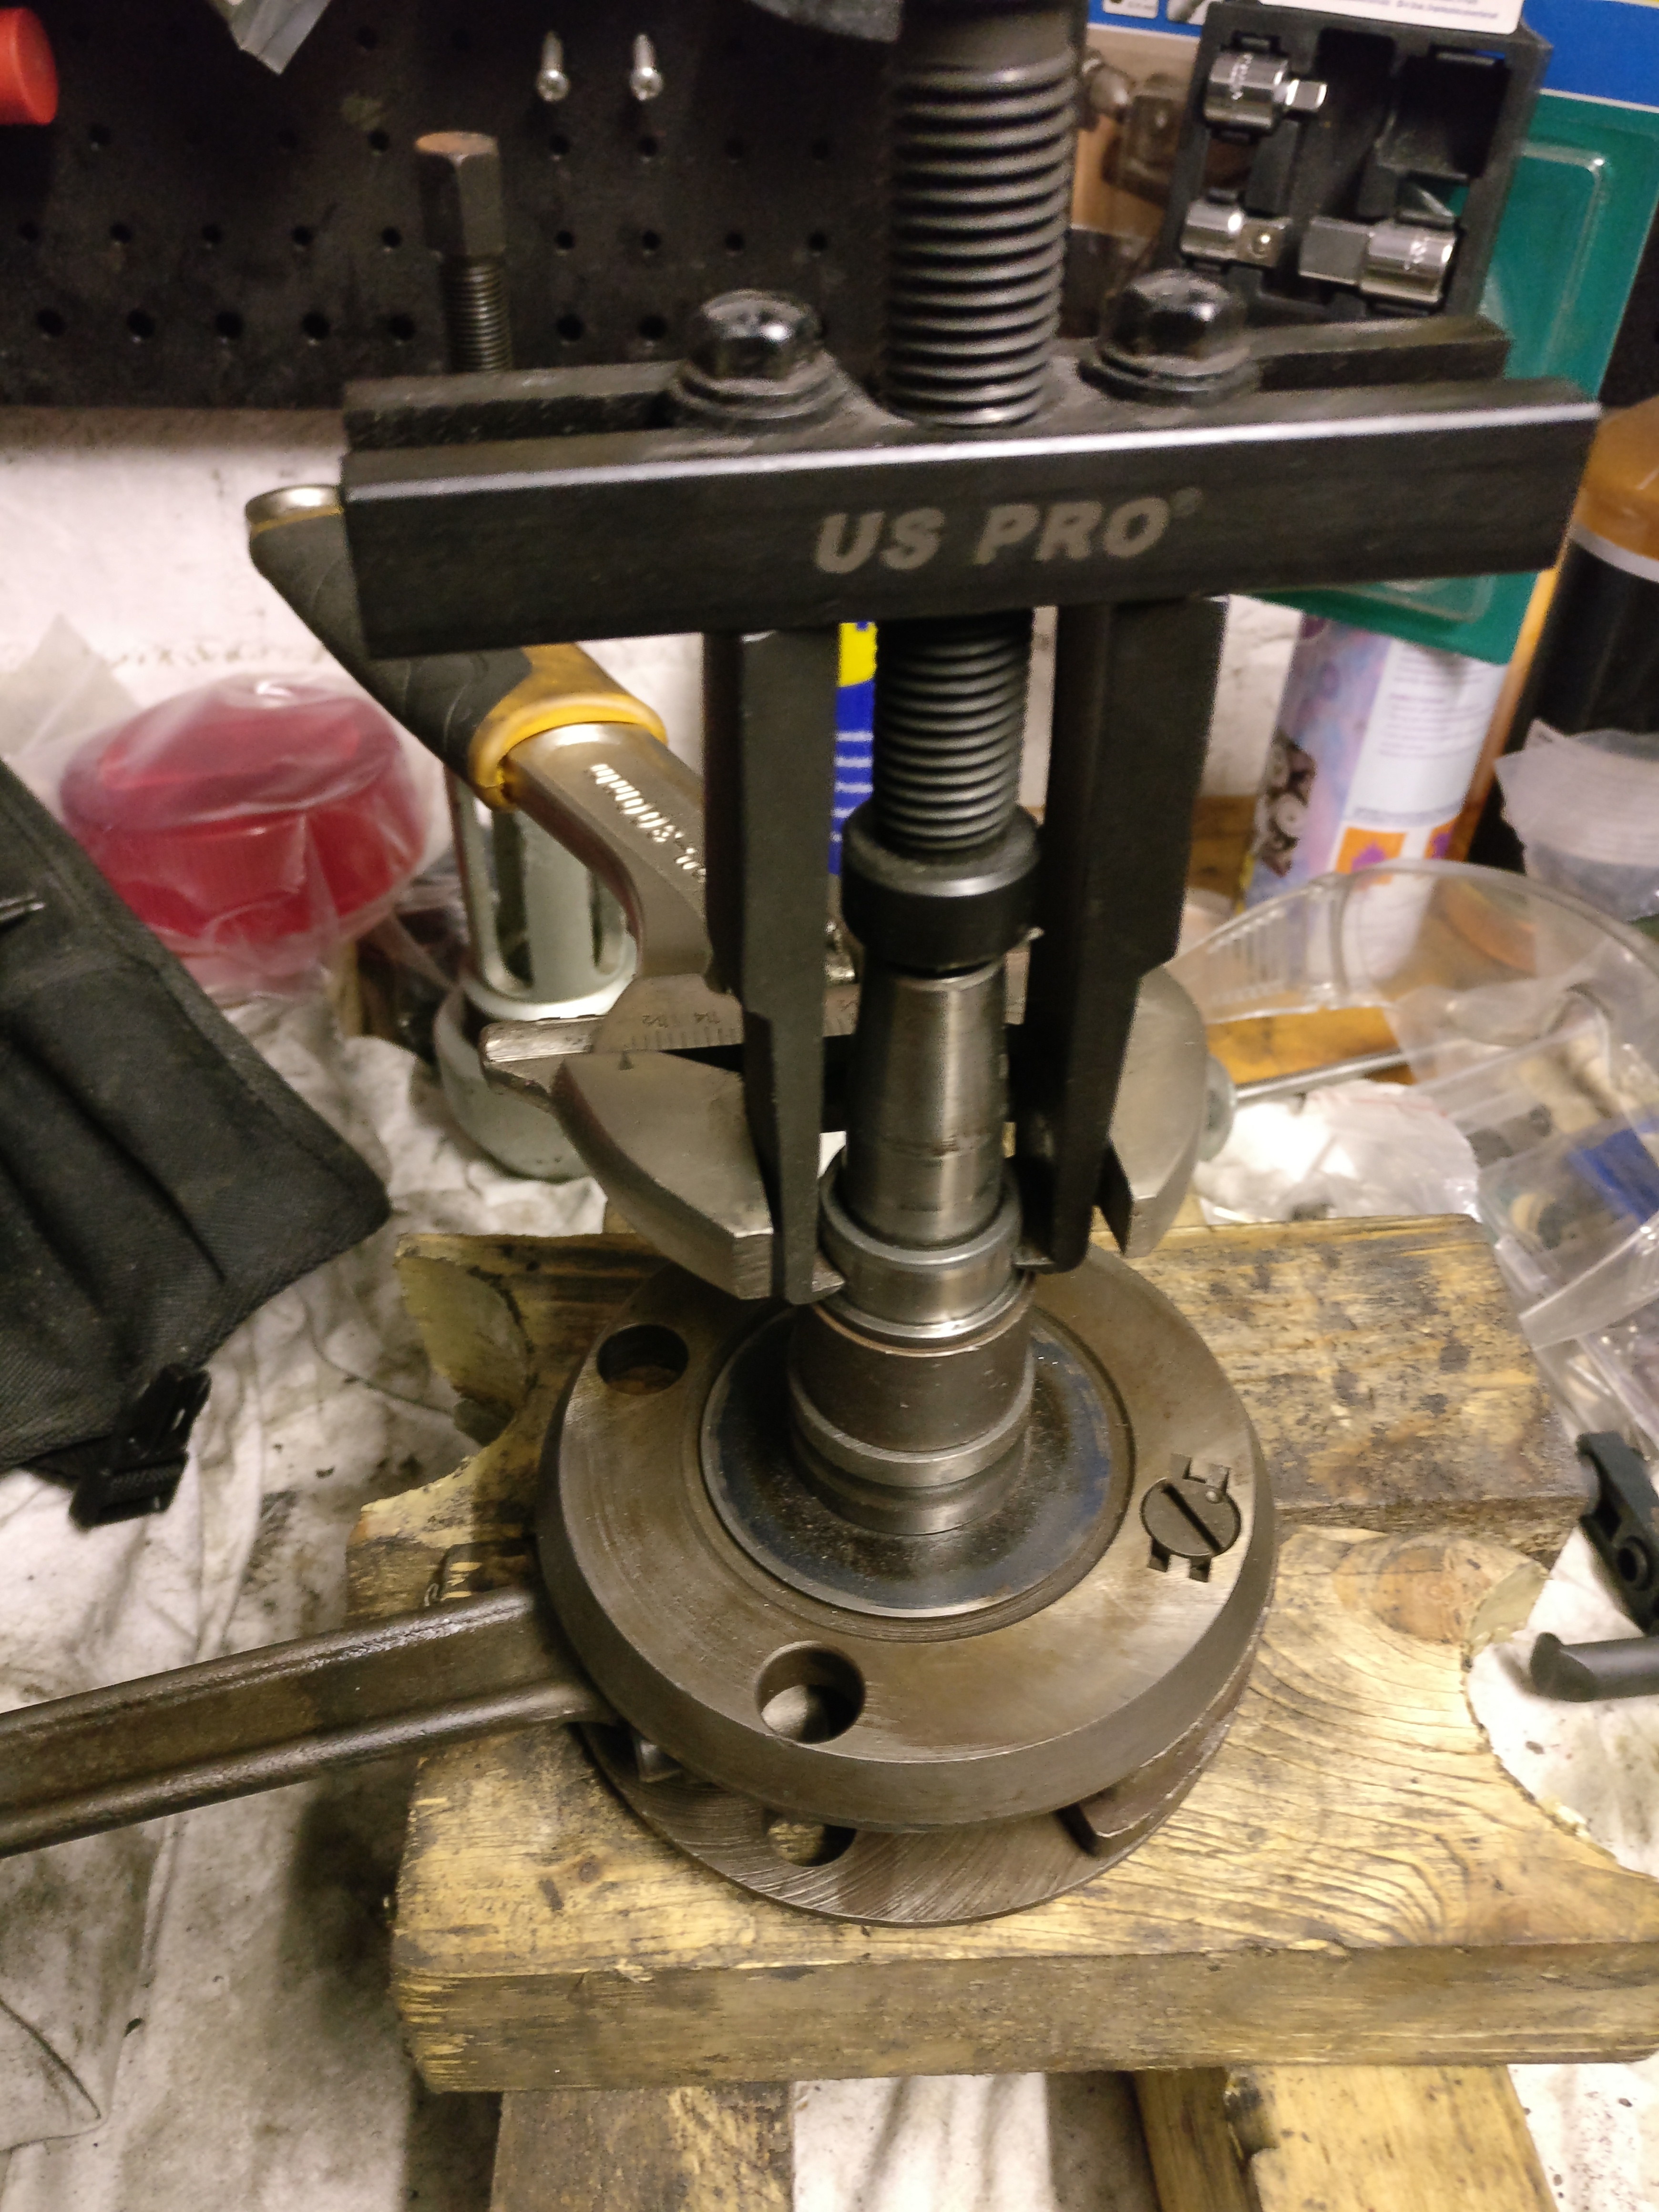
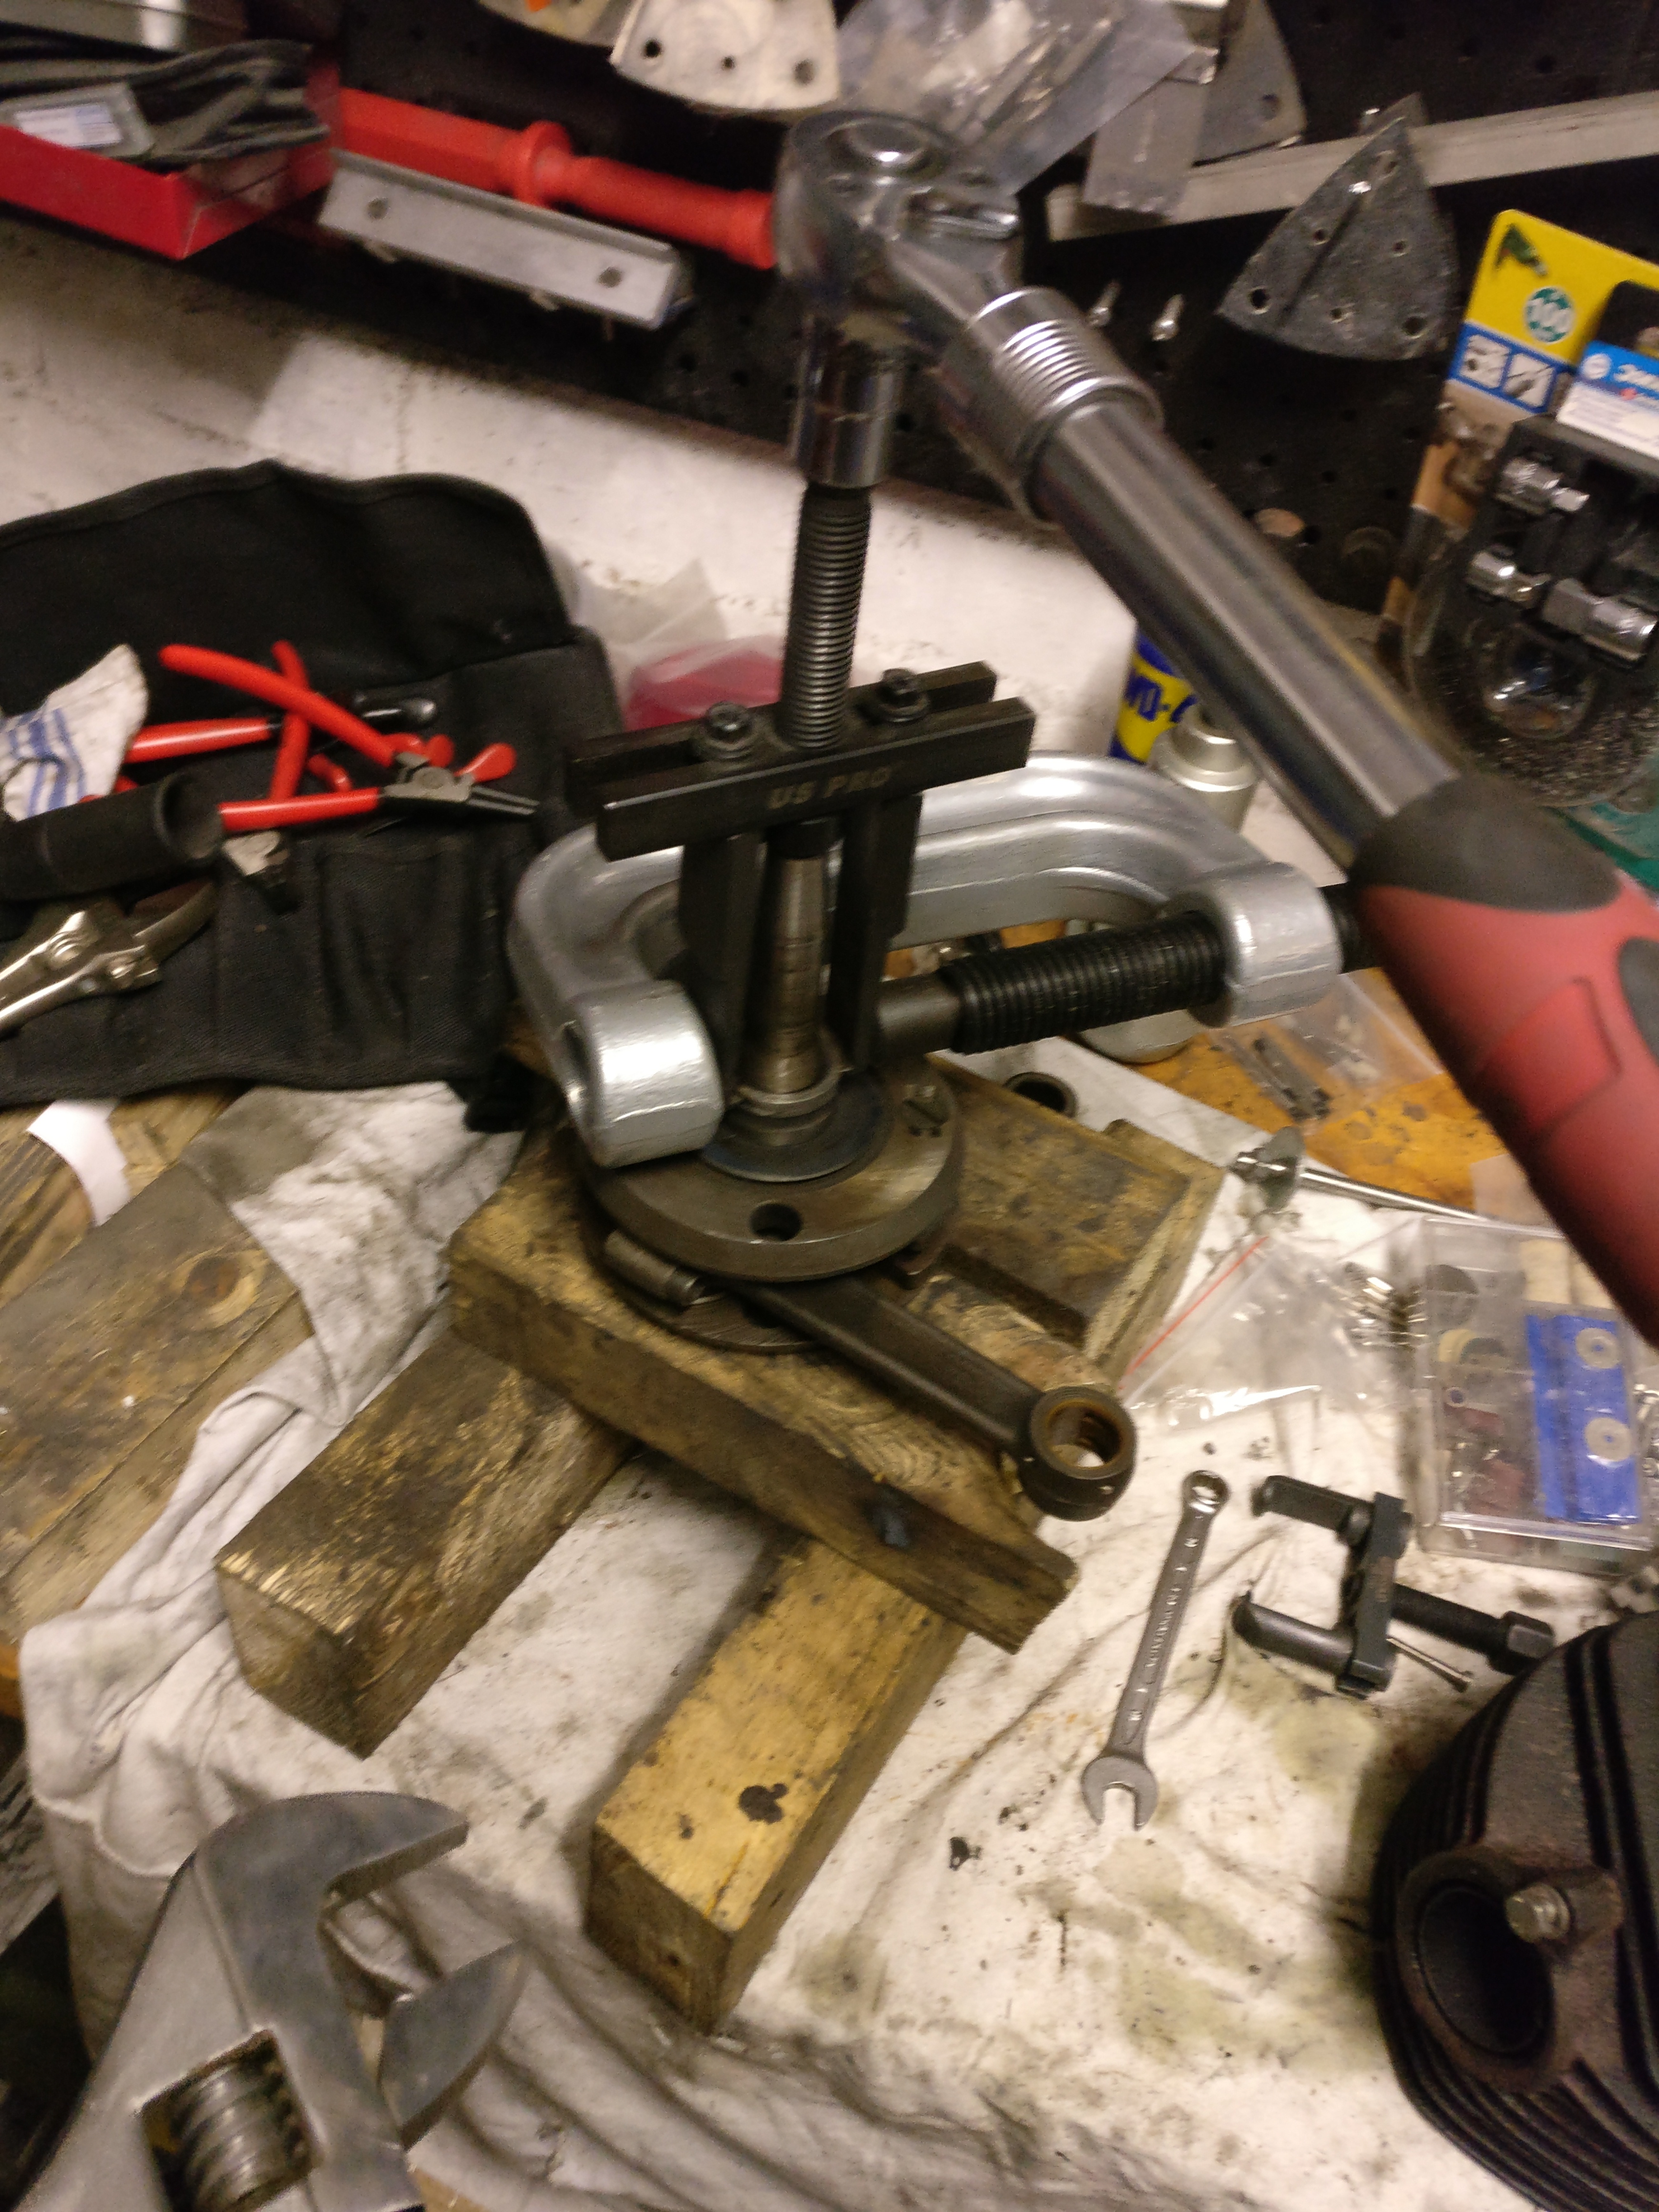
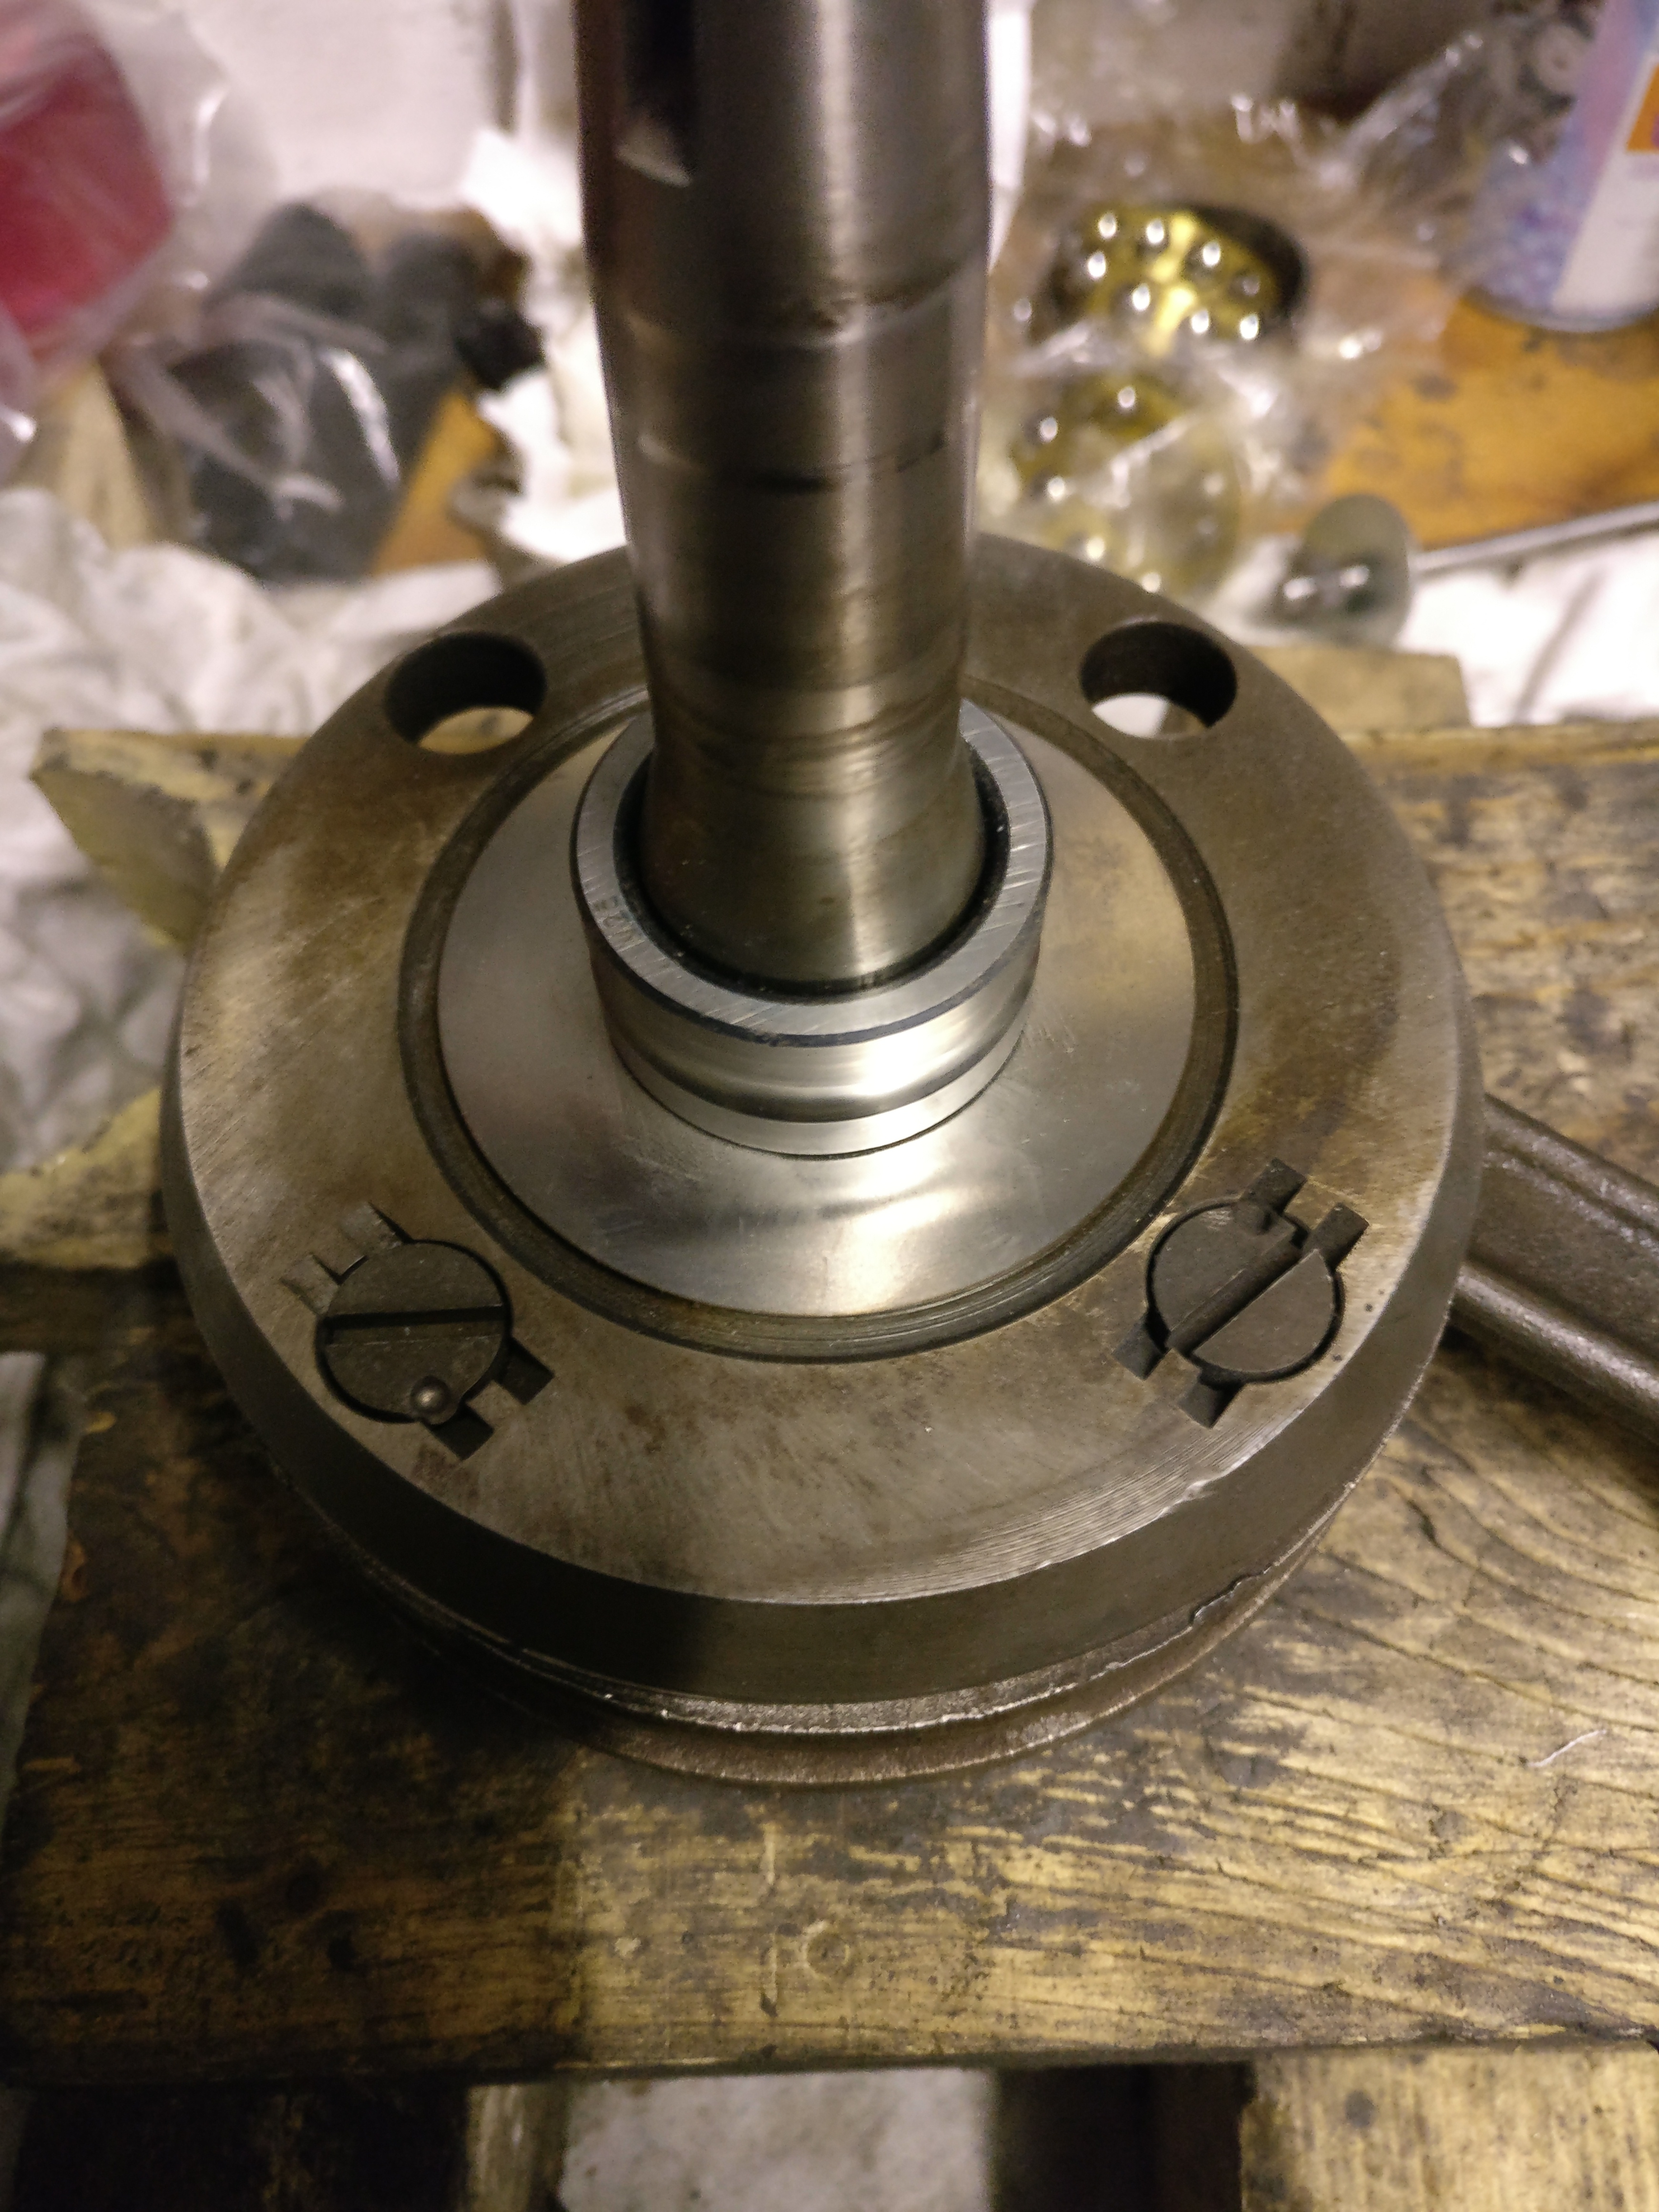
Replacing the crankshaft bearings
Still haven’t found a great way of removing the crankshaft bearings other than grinding a channel in them and using a basic puller:
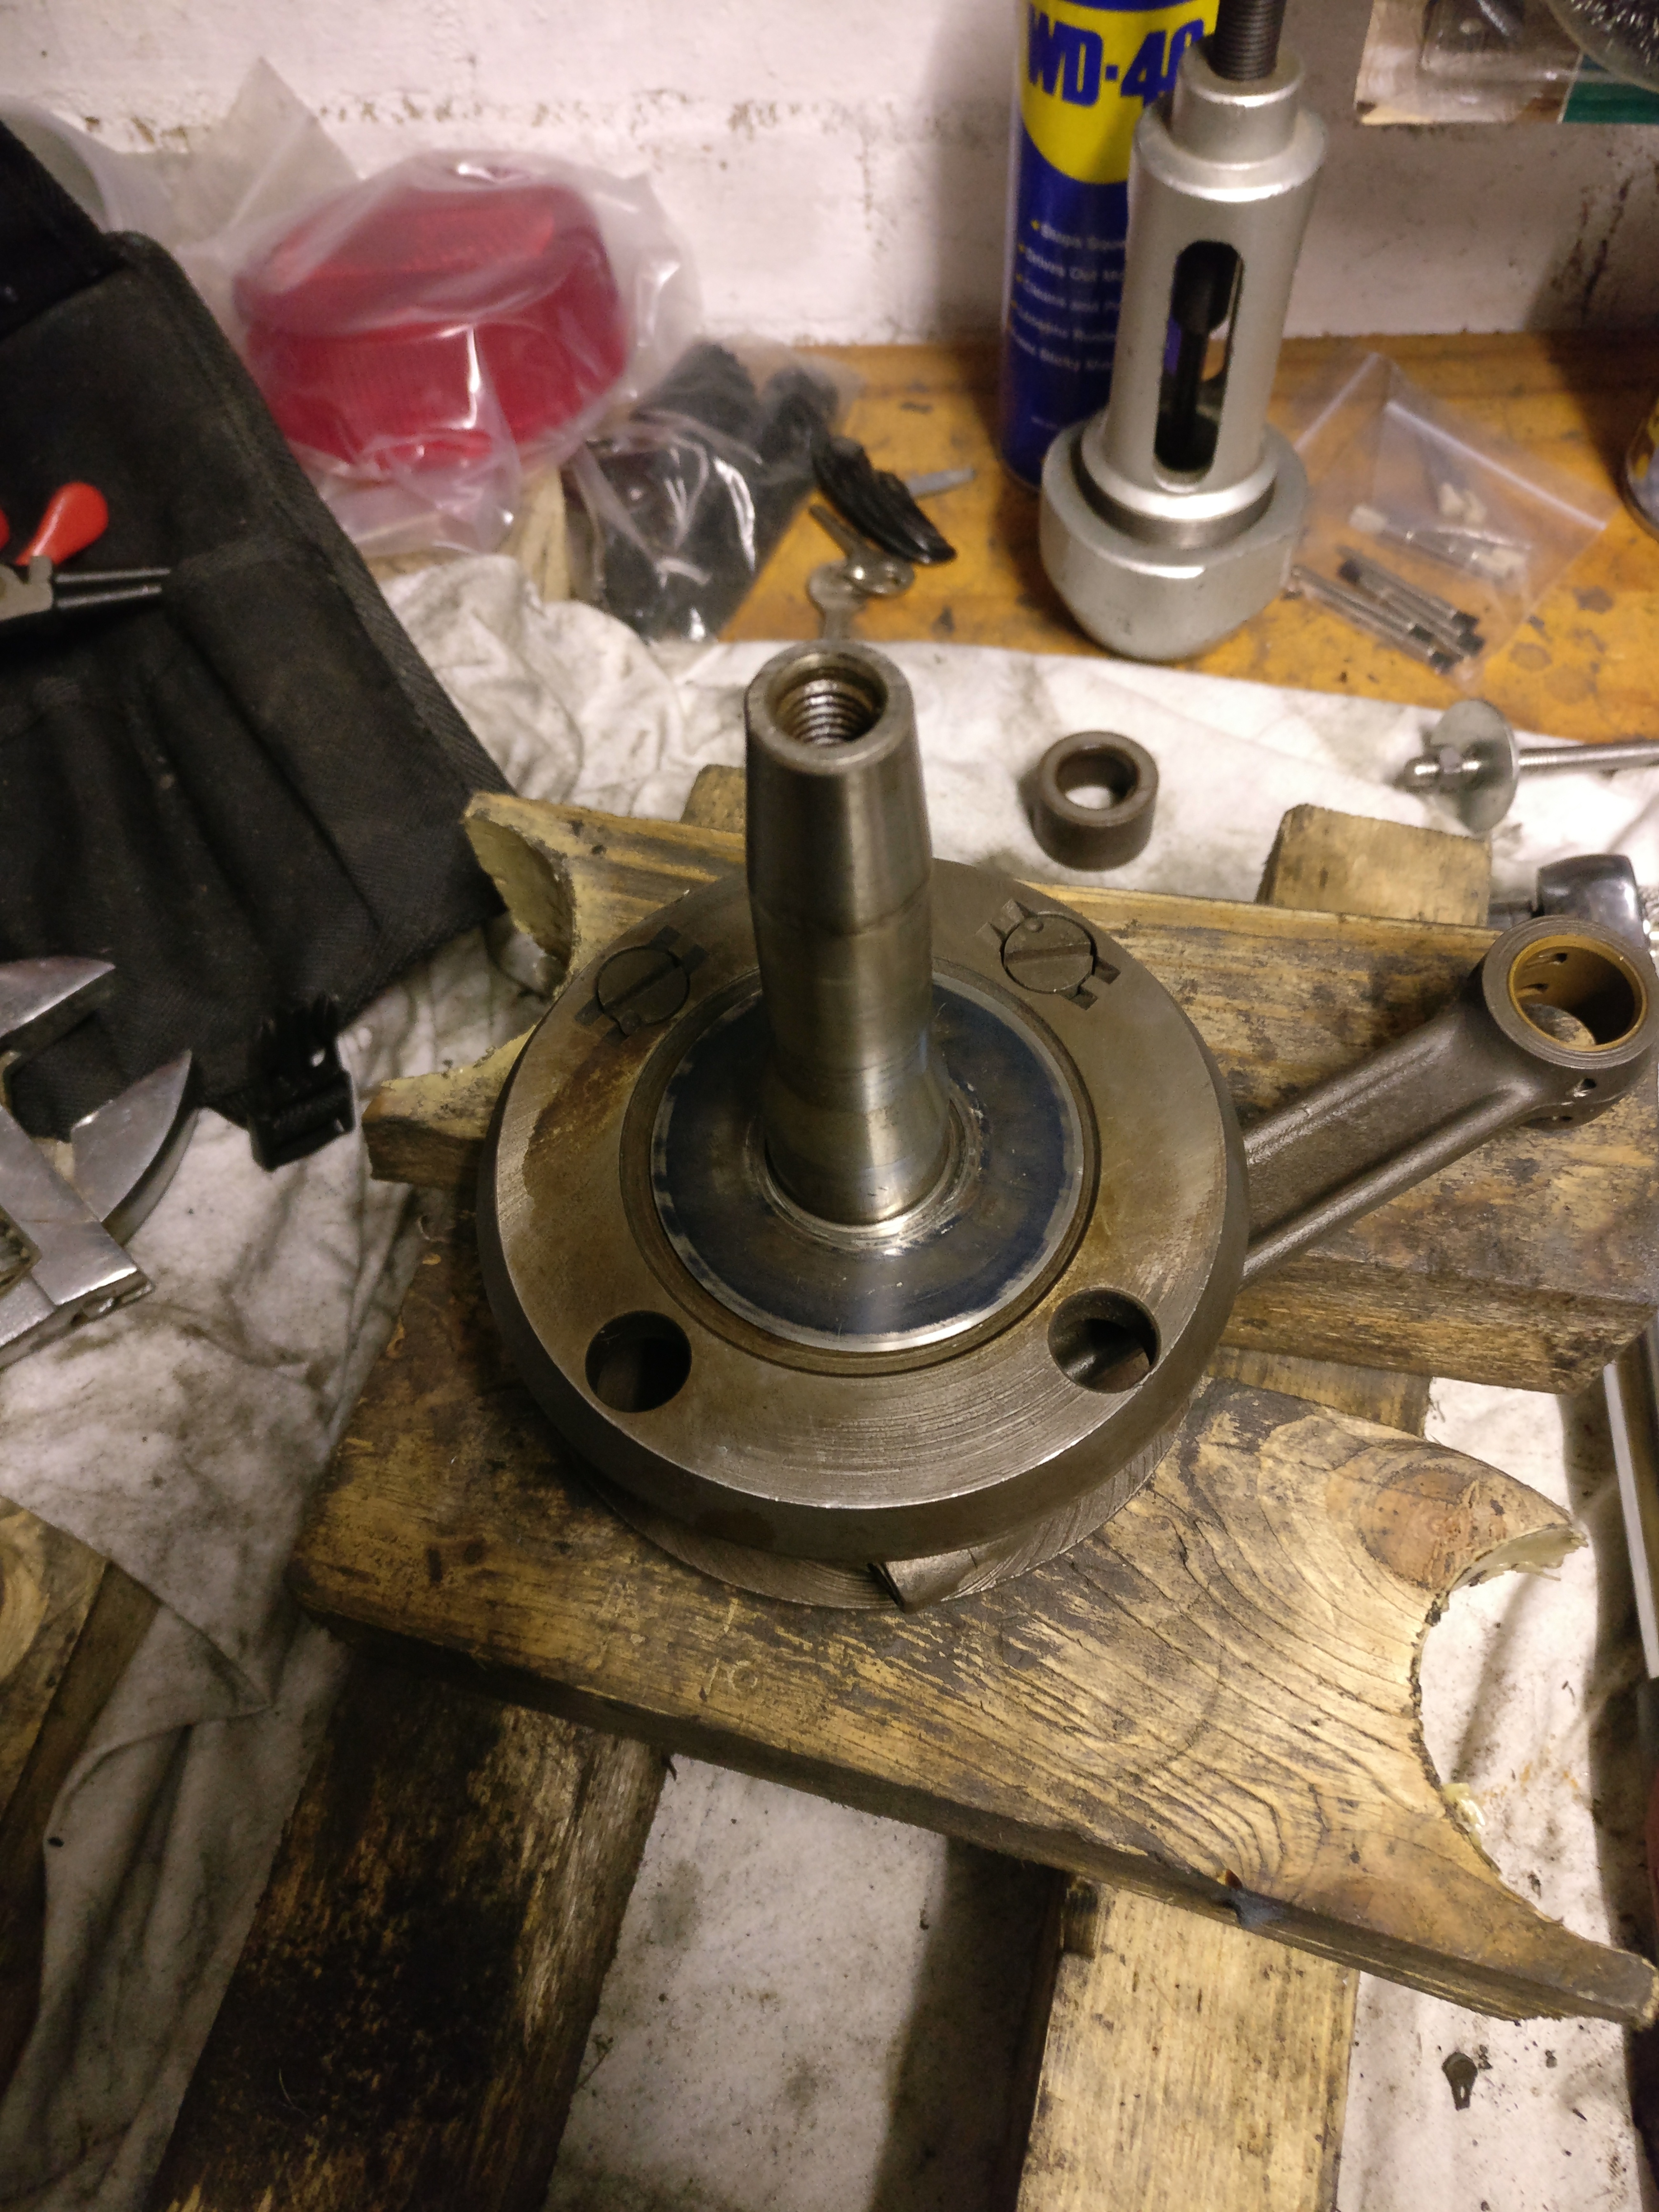
The bearing protective shims were slightly bent so these are replaced with new ones:
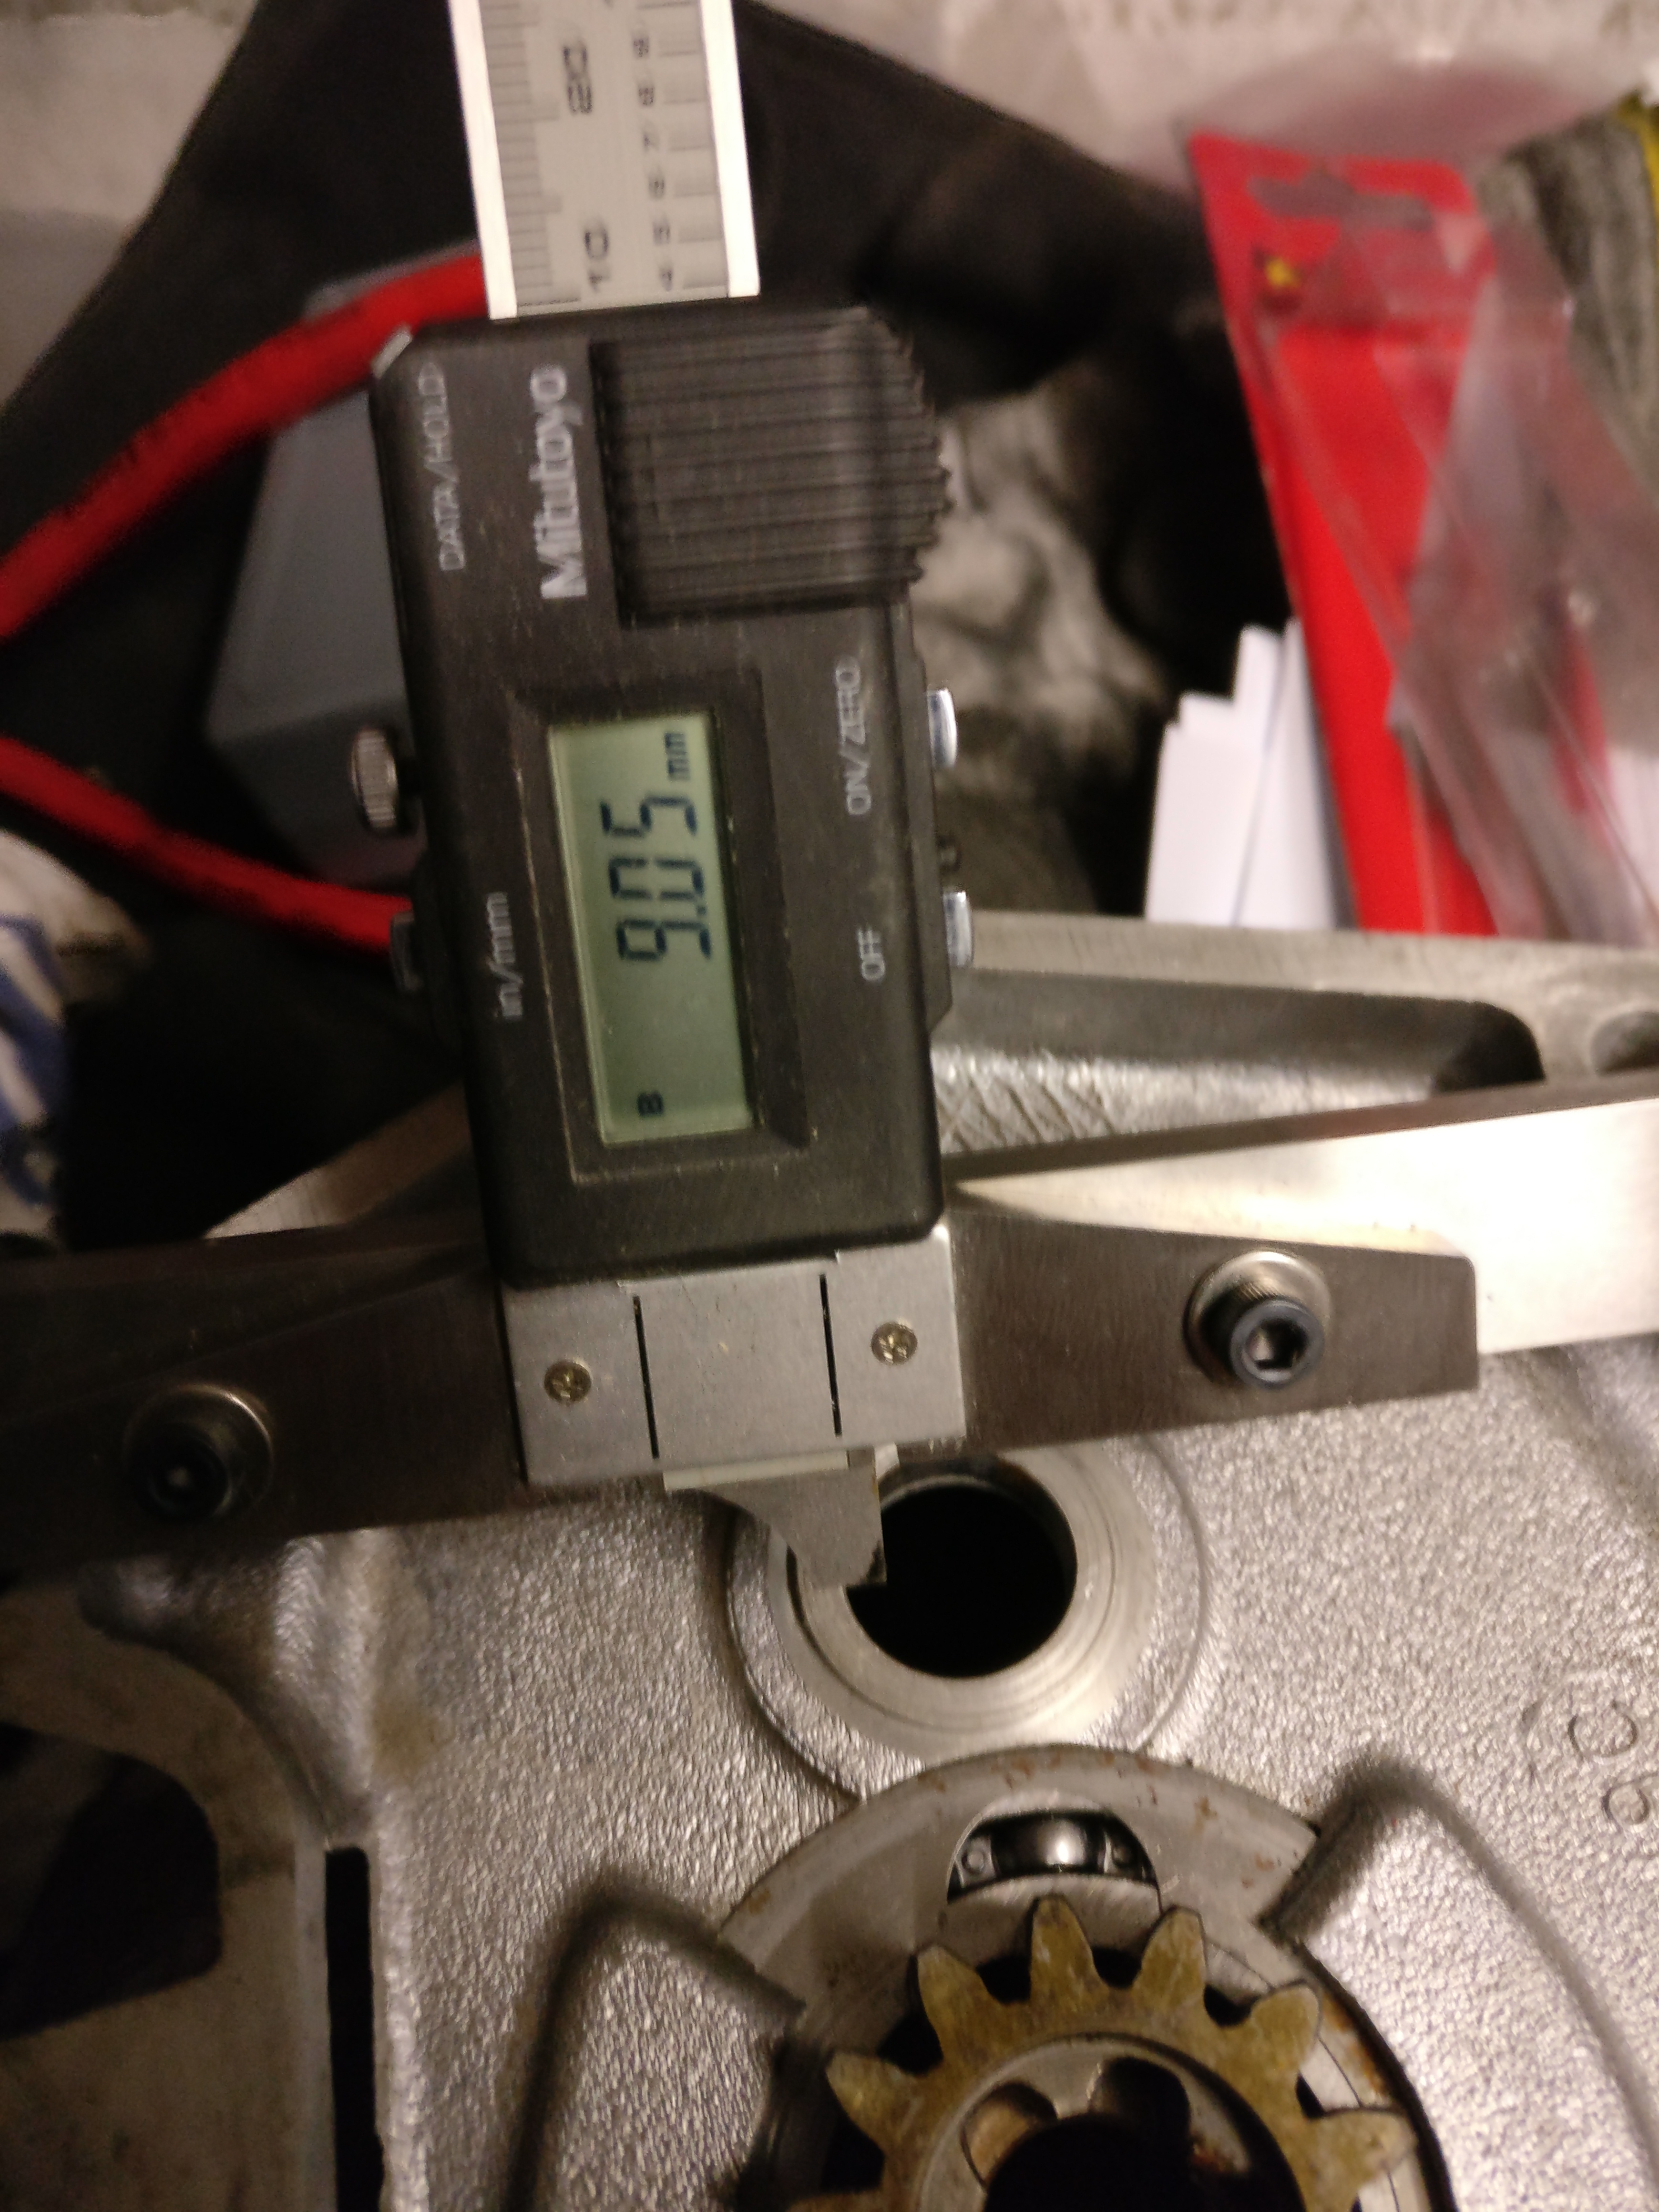
Measuring in the engine:
Need to ensure that the axial play of the crankshaft is limited between 0.1 and 0.2 mm
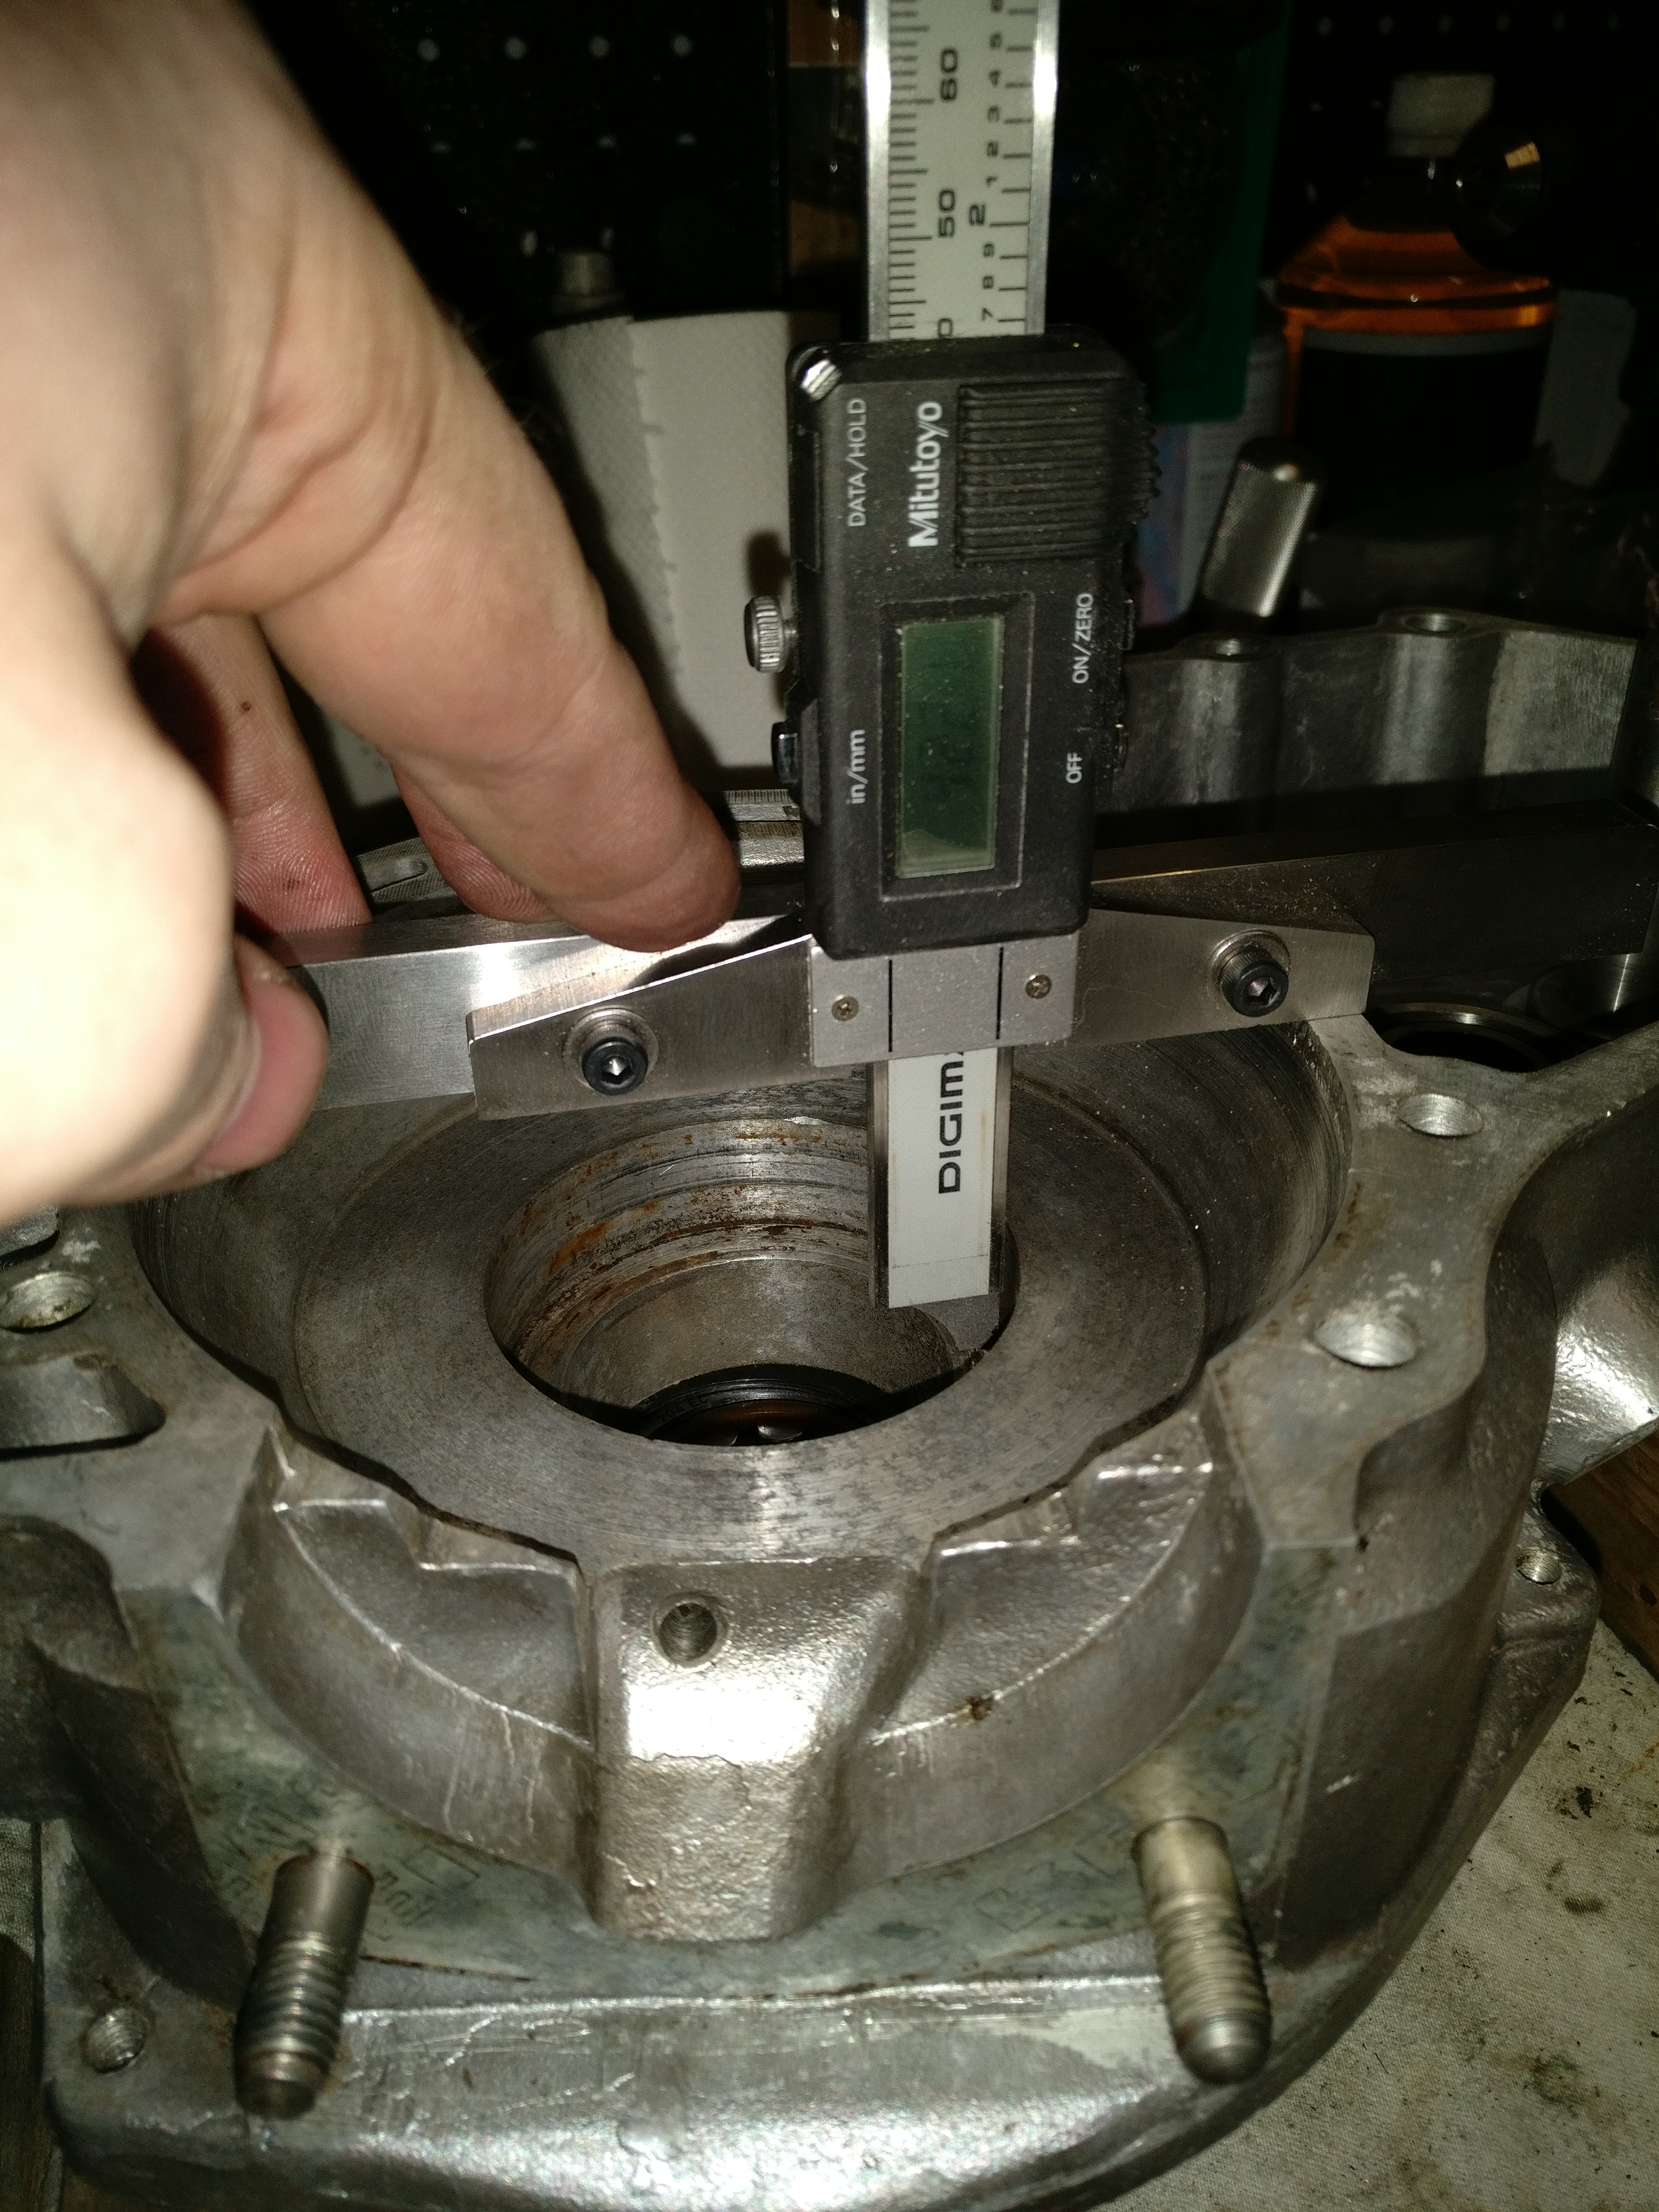
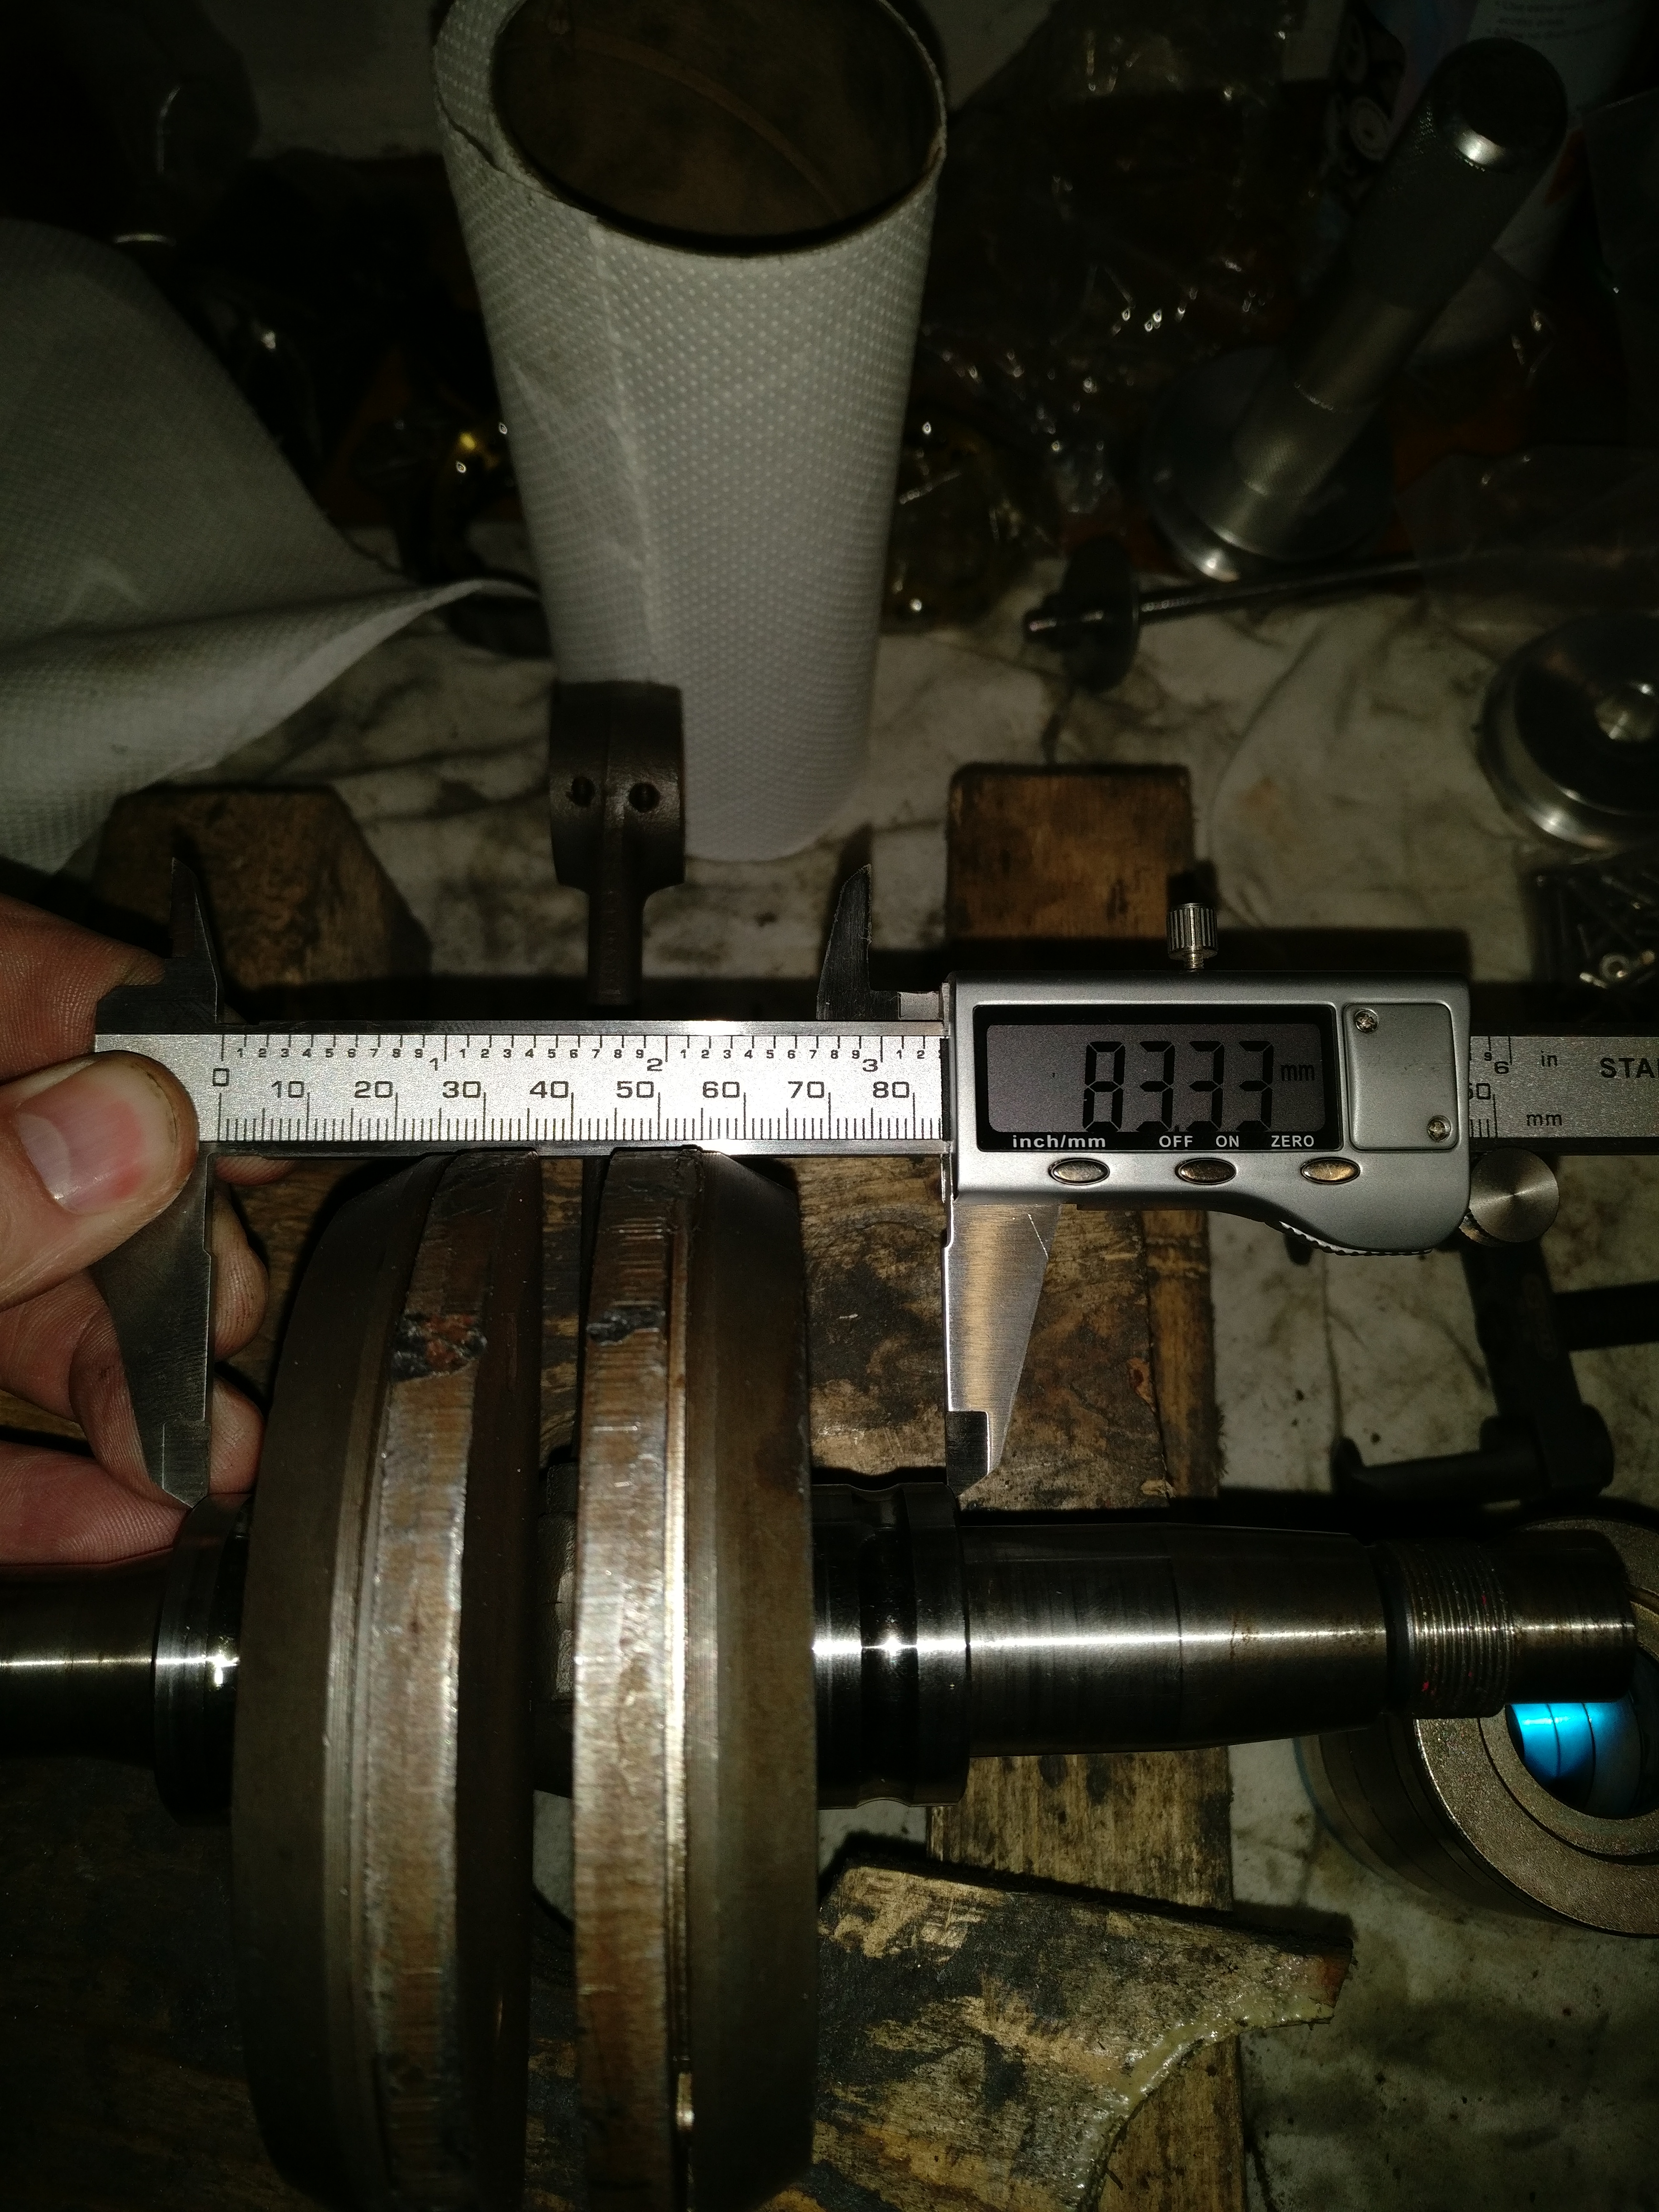

The crankshaft is 83.33mm. The flywheel side case to bearing is 24.25mm + 17mm (thickness bearing) = 41.25. The generator side is 42.21mm, however with the bearing in it reduces to 25.25 + 17mm = 42.25. Total = 41.25 + 42.25 = 83.50.
The crankshaft is 83.33, so the play is therefore 83.50 – 83.33 = 0.17 mm. Perfect! We achieved this by putting 1.05mm of shimming behind the generator bearing (original shims re-used). Just shows that the original factory measurements were spot on!
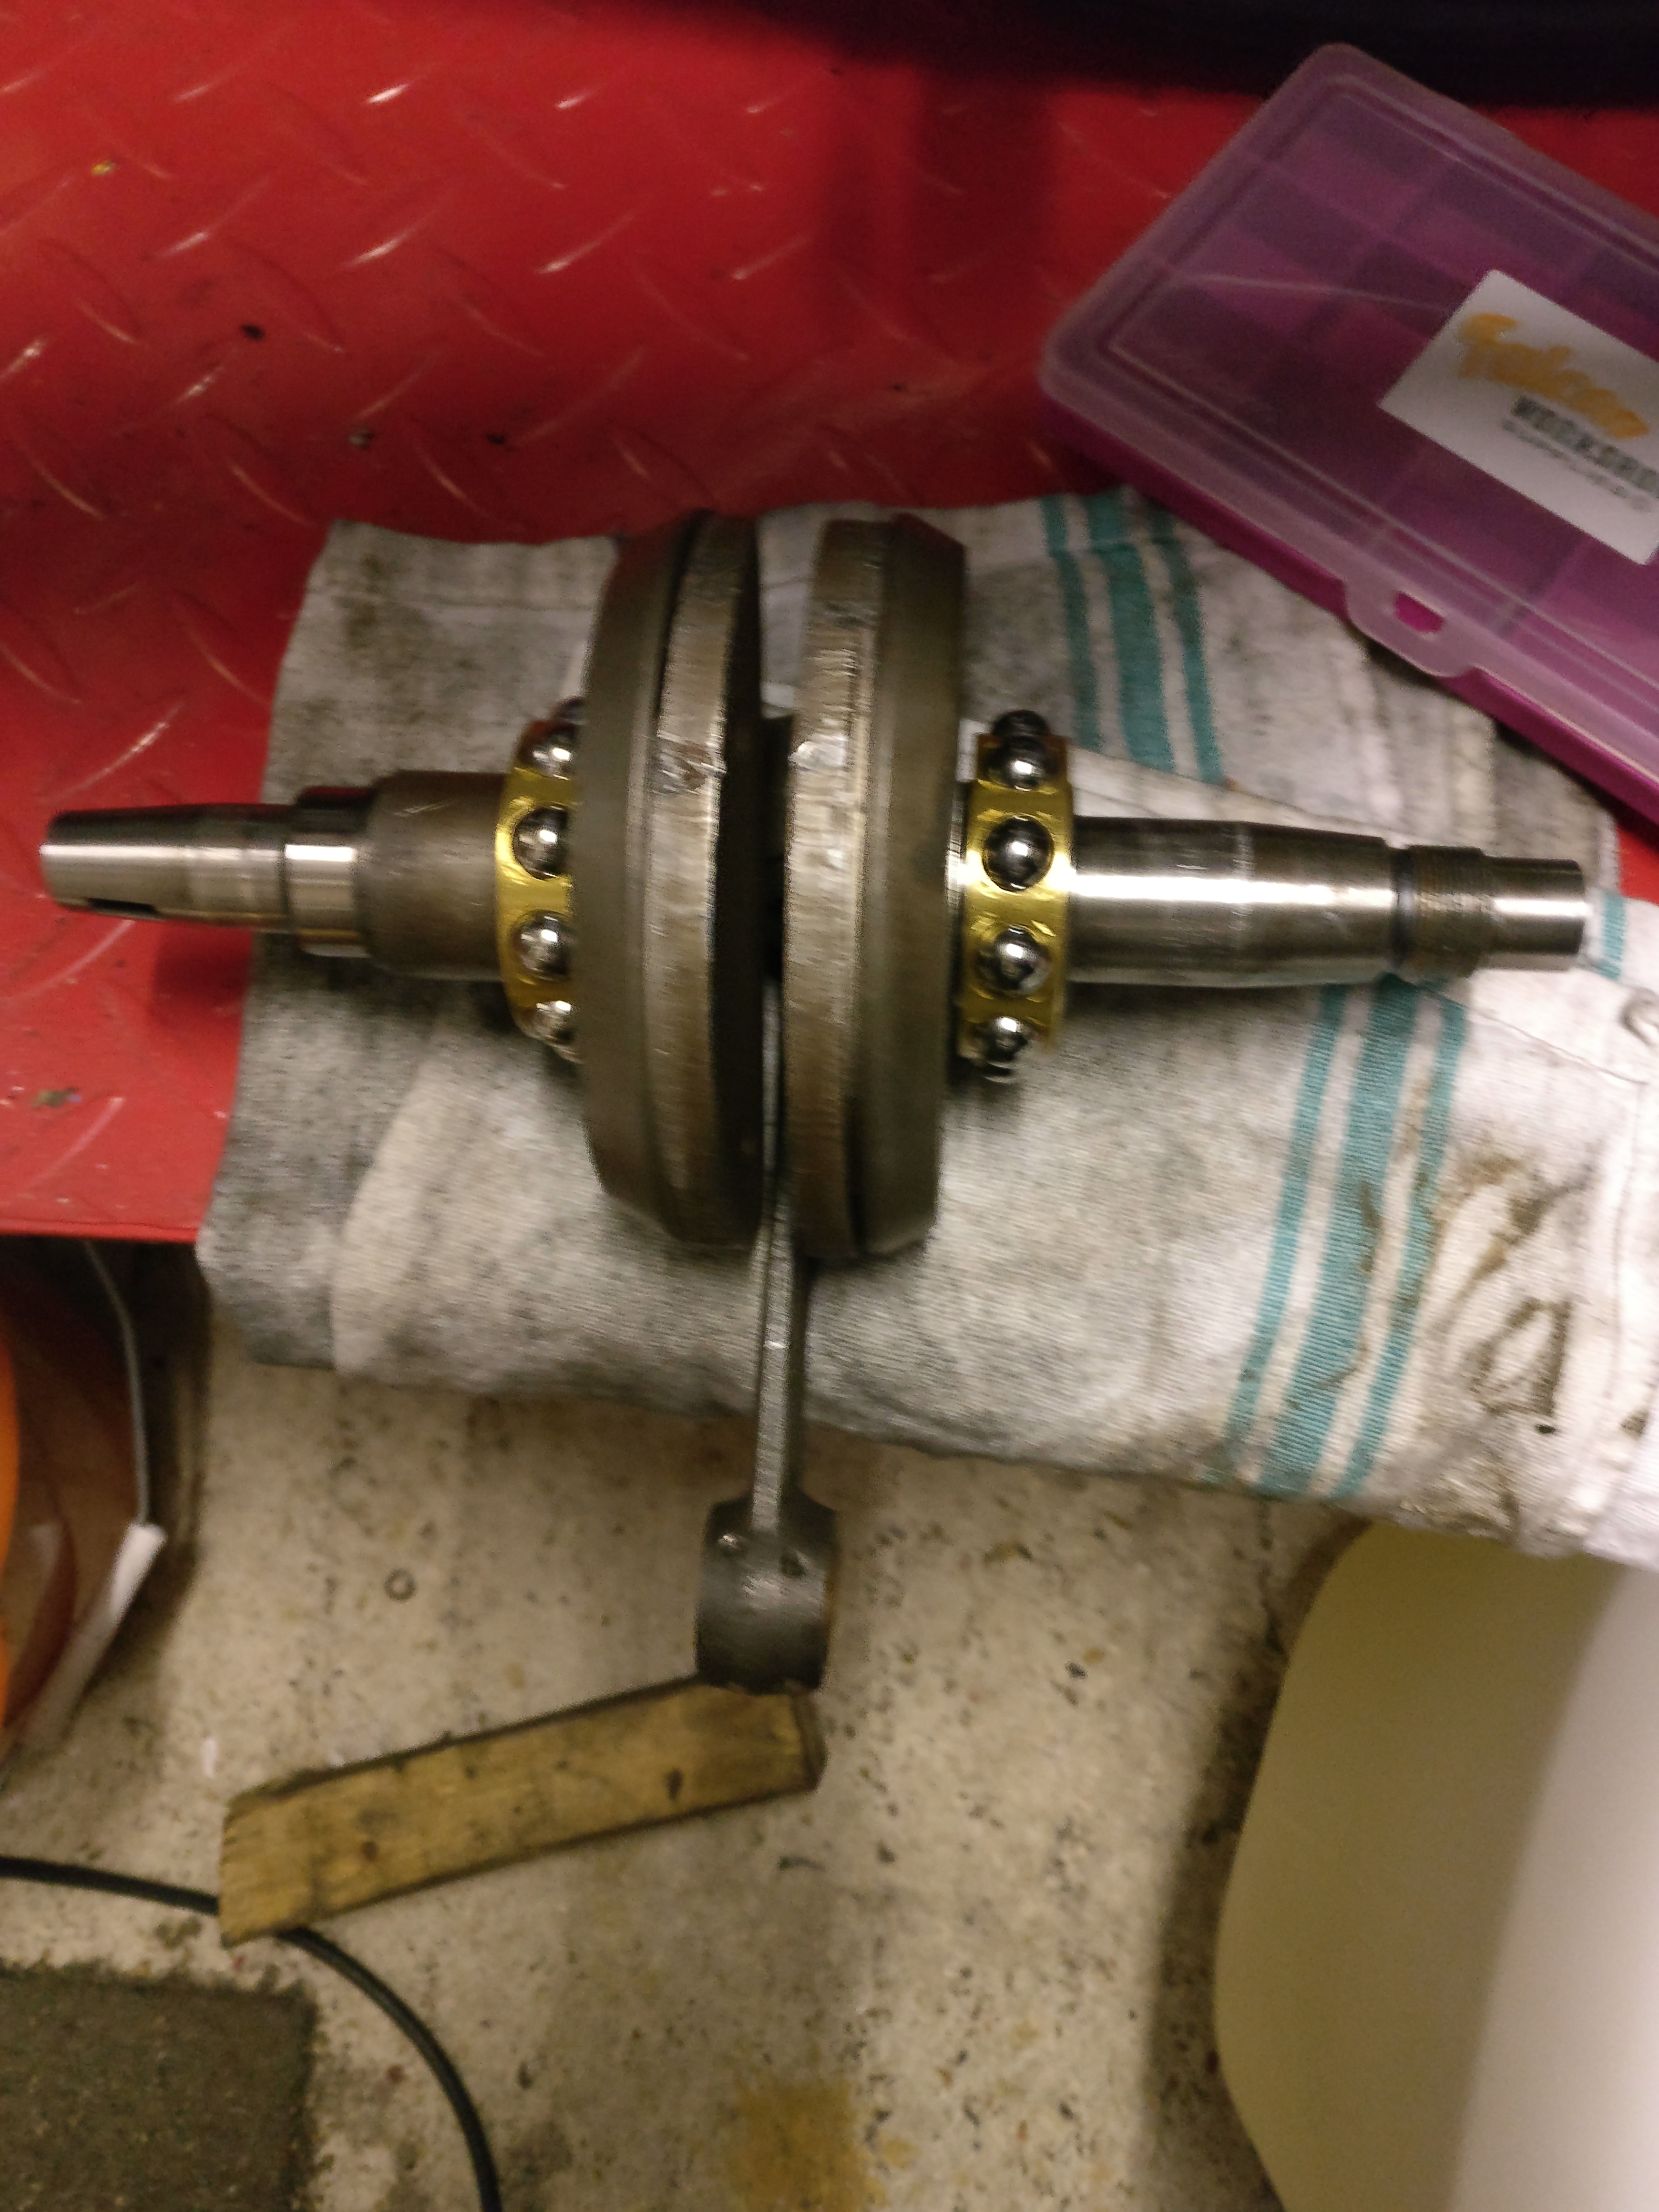
Next we put the bearing rings on the crankshaft. All shiny and new…
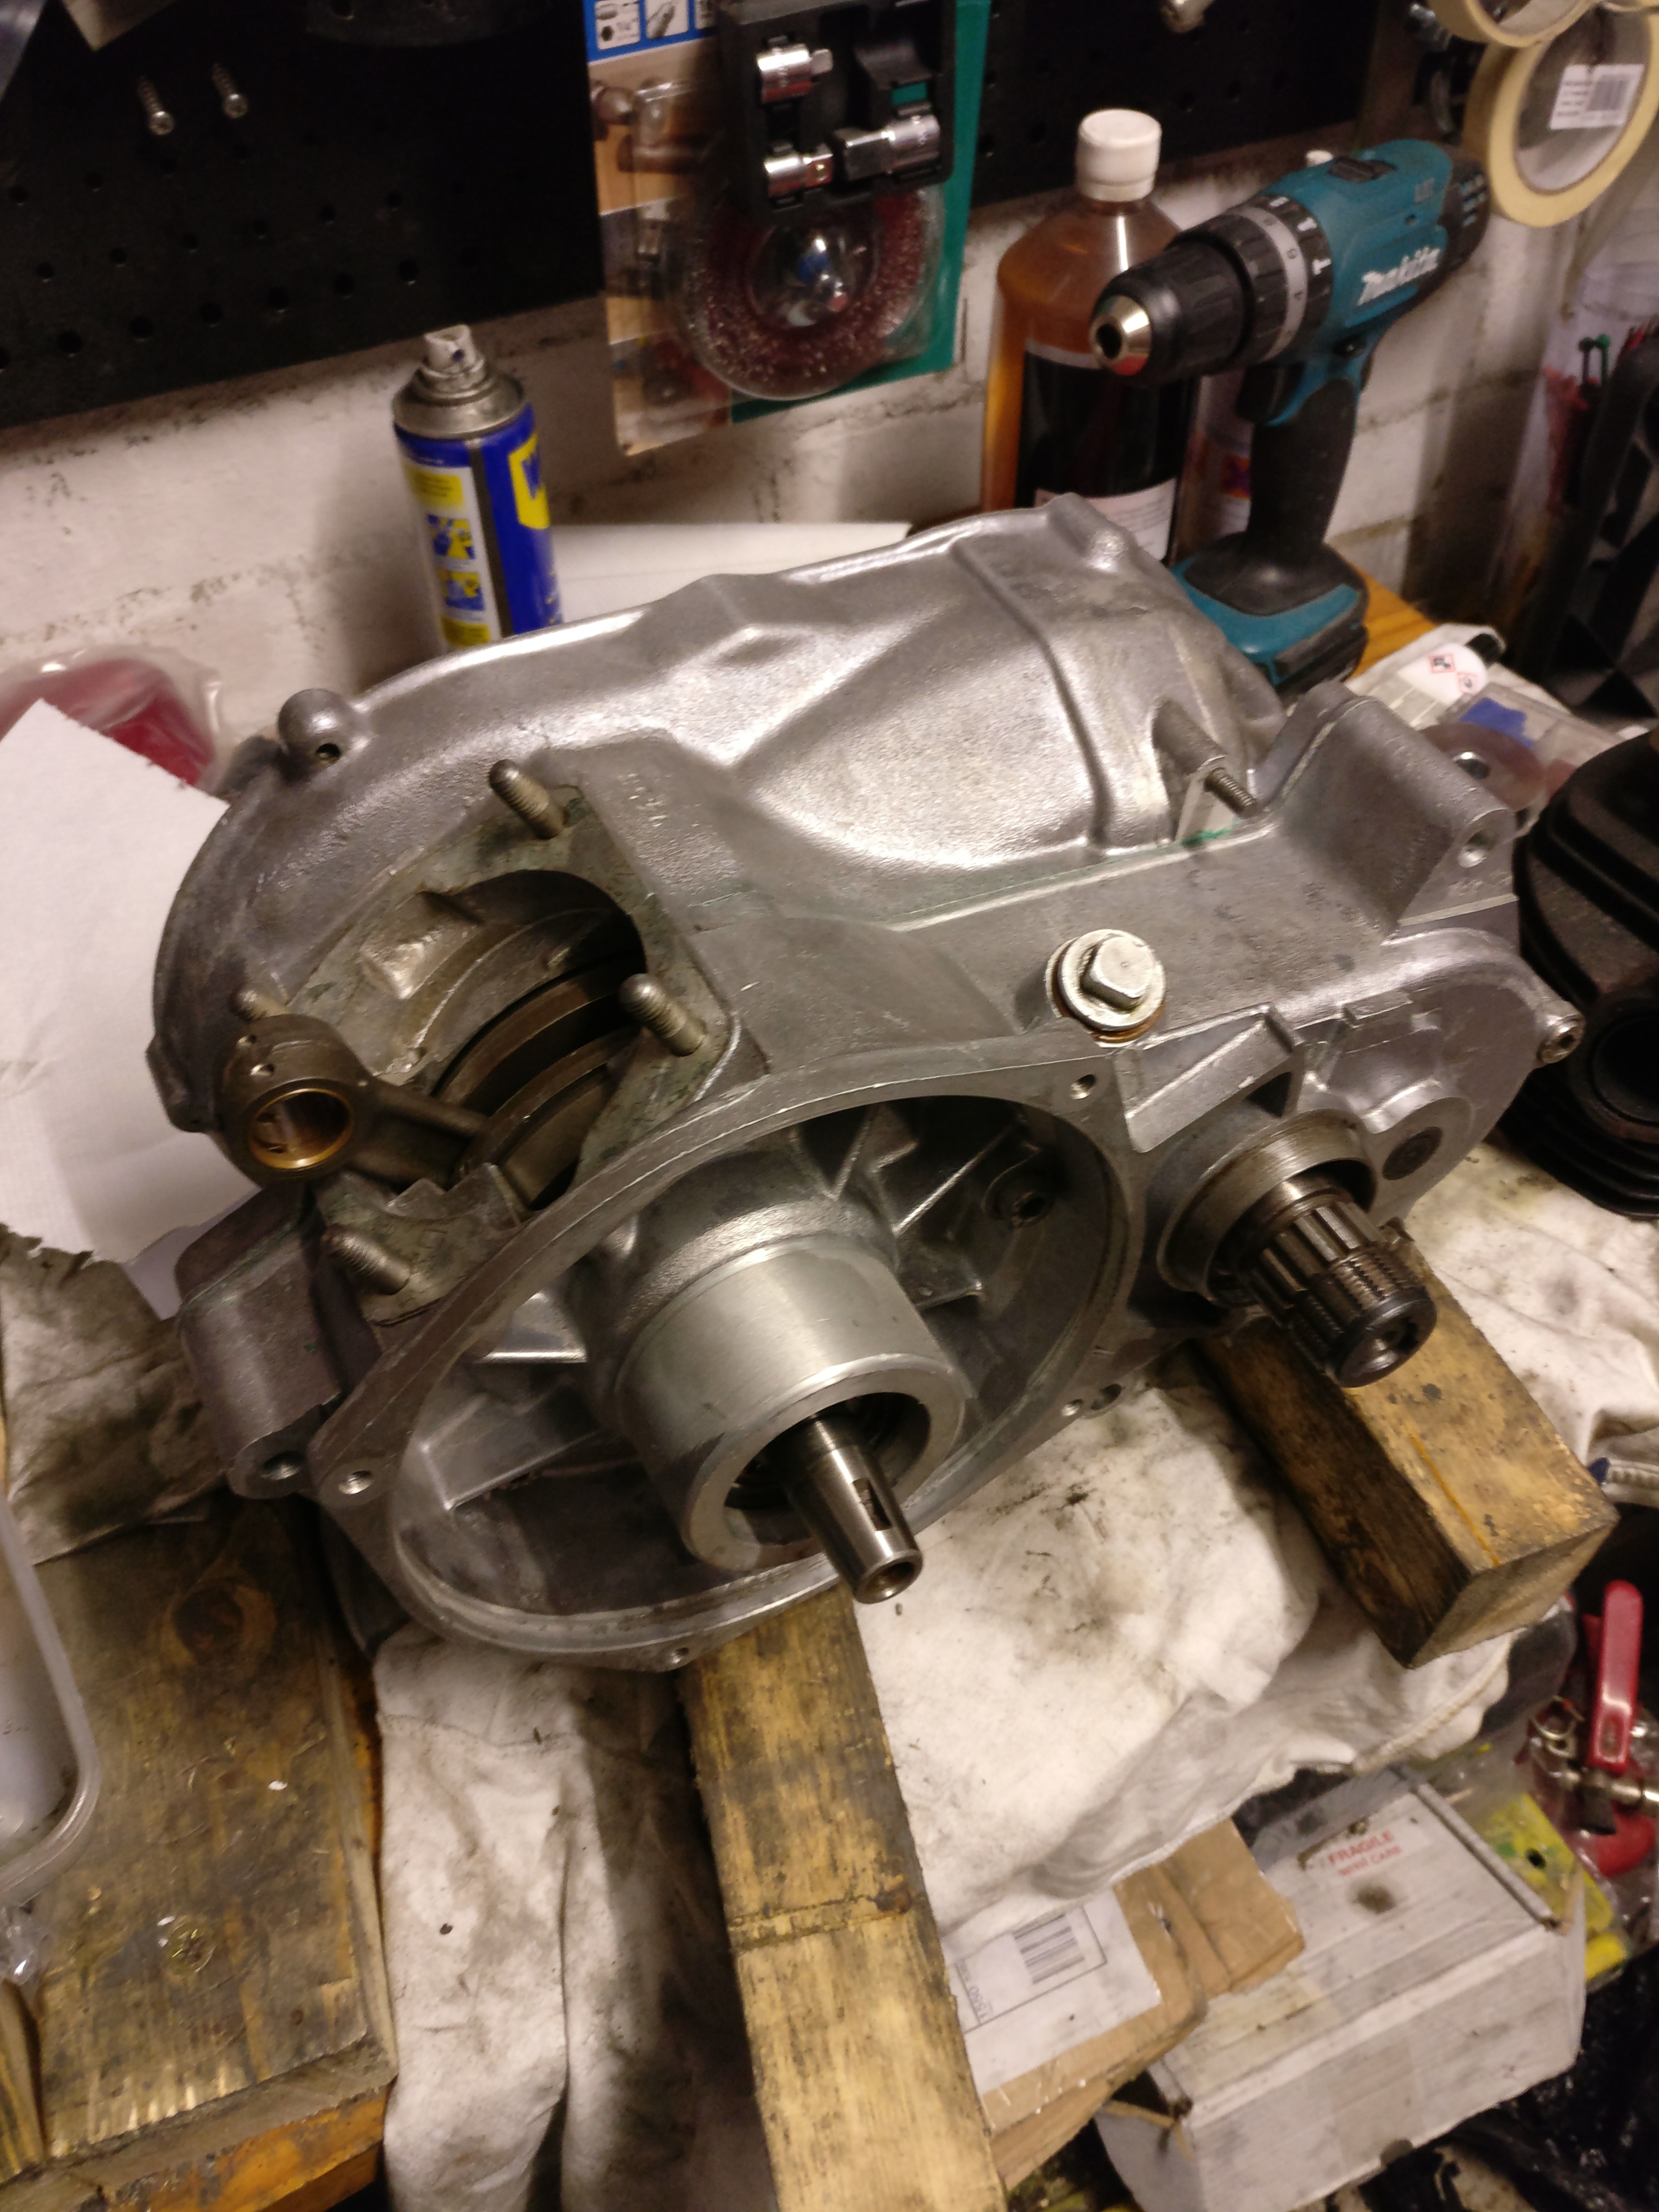
Preparing for closing the case
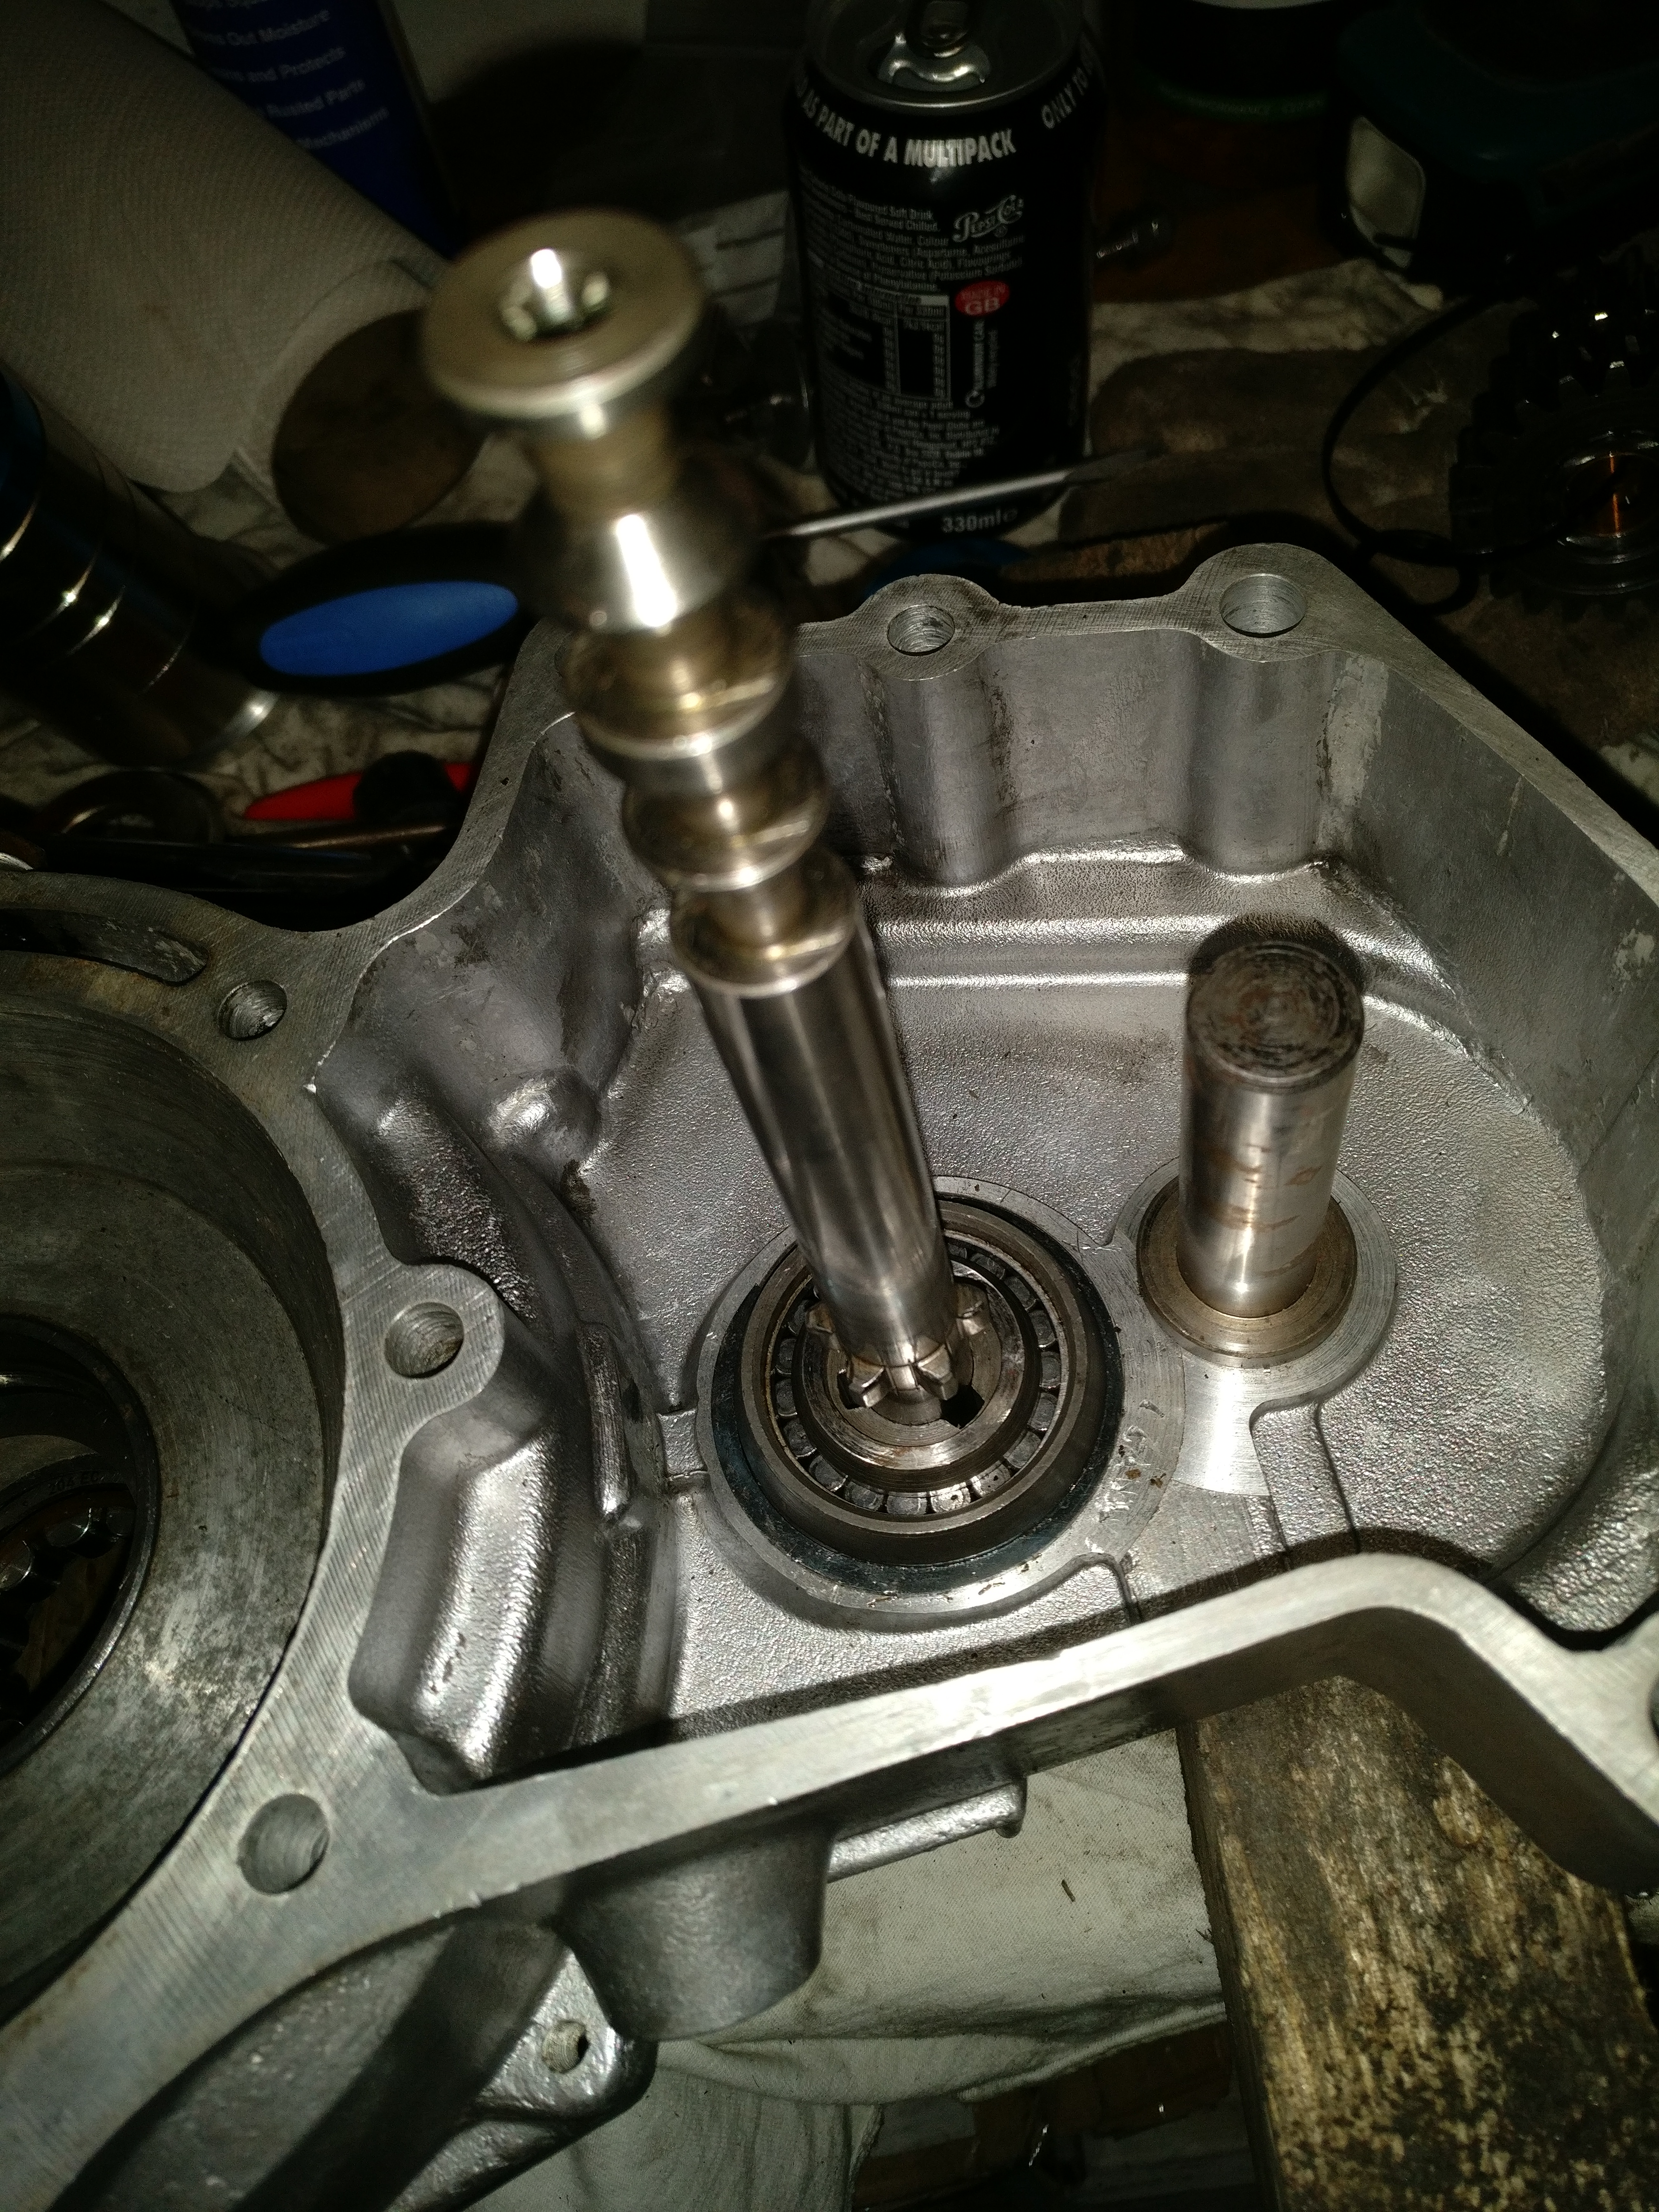
First we install the clutch shaft:
Very simple – the shaft was put in the freezer for an hour, the case was heated to 140 degrees celcius and the shaft literally dropped in. Put the seeger ring on and this is going nowhere.
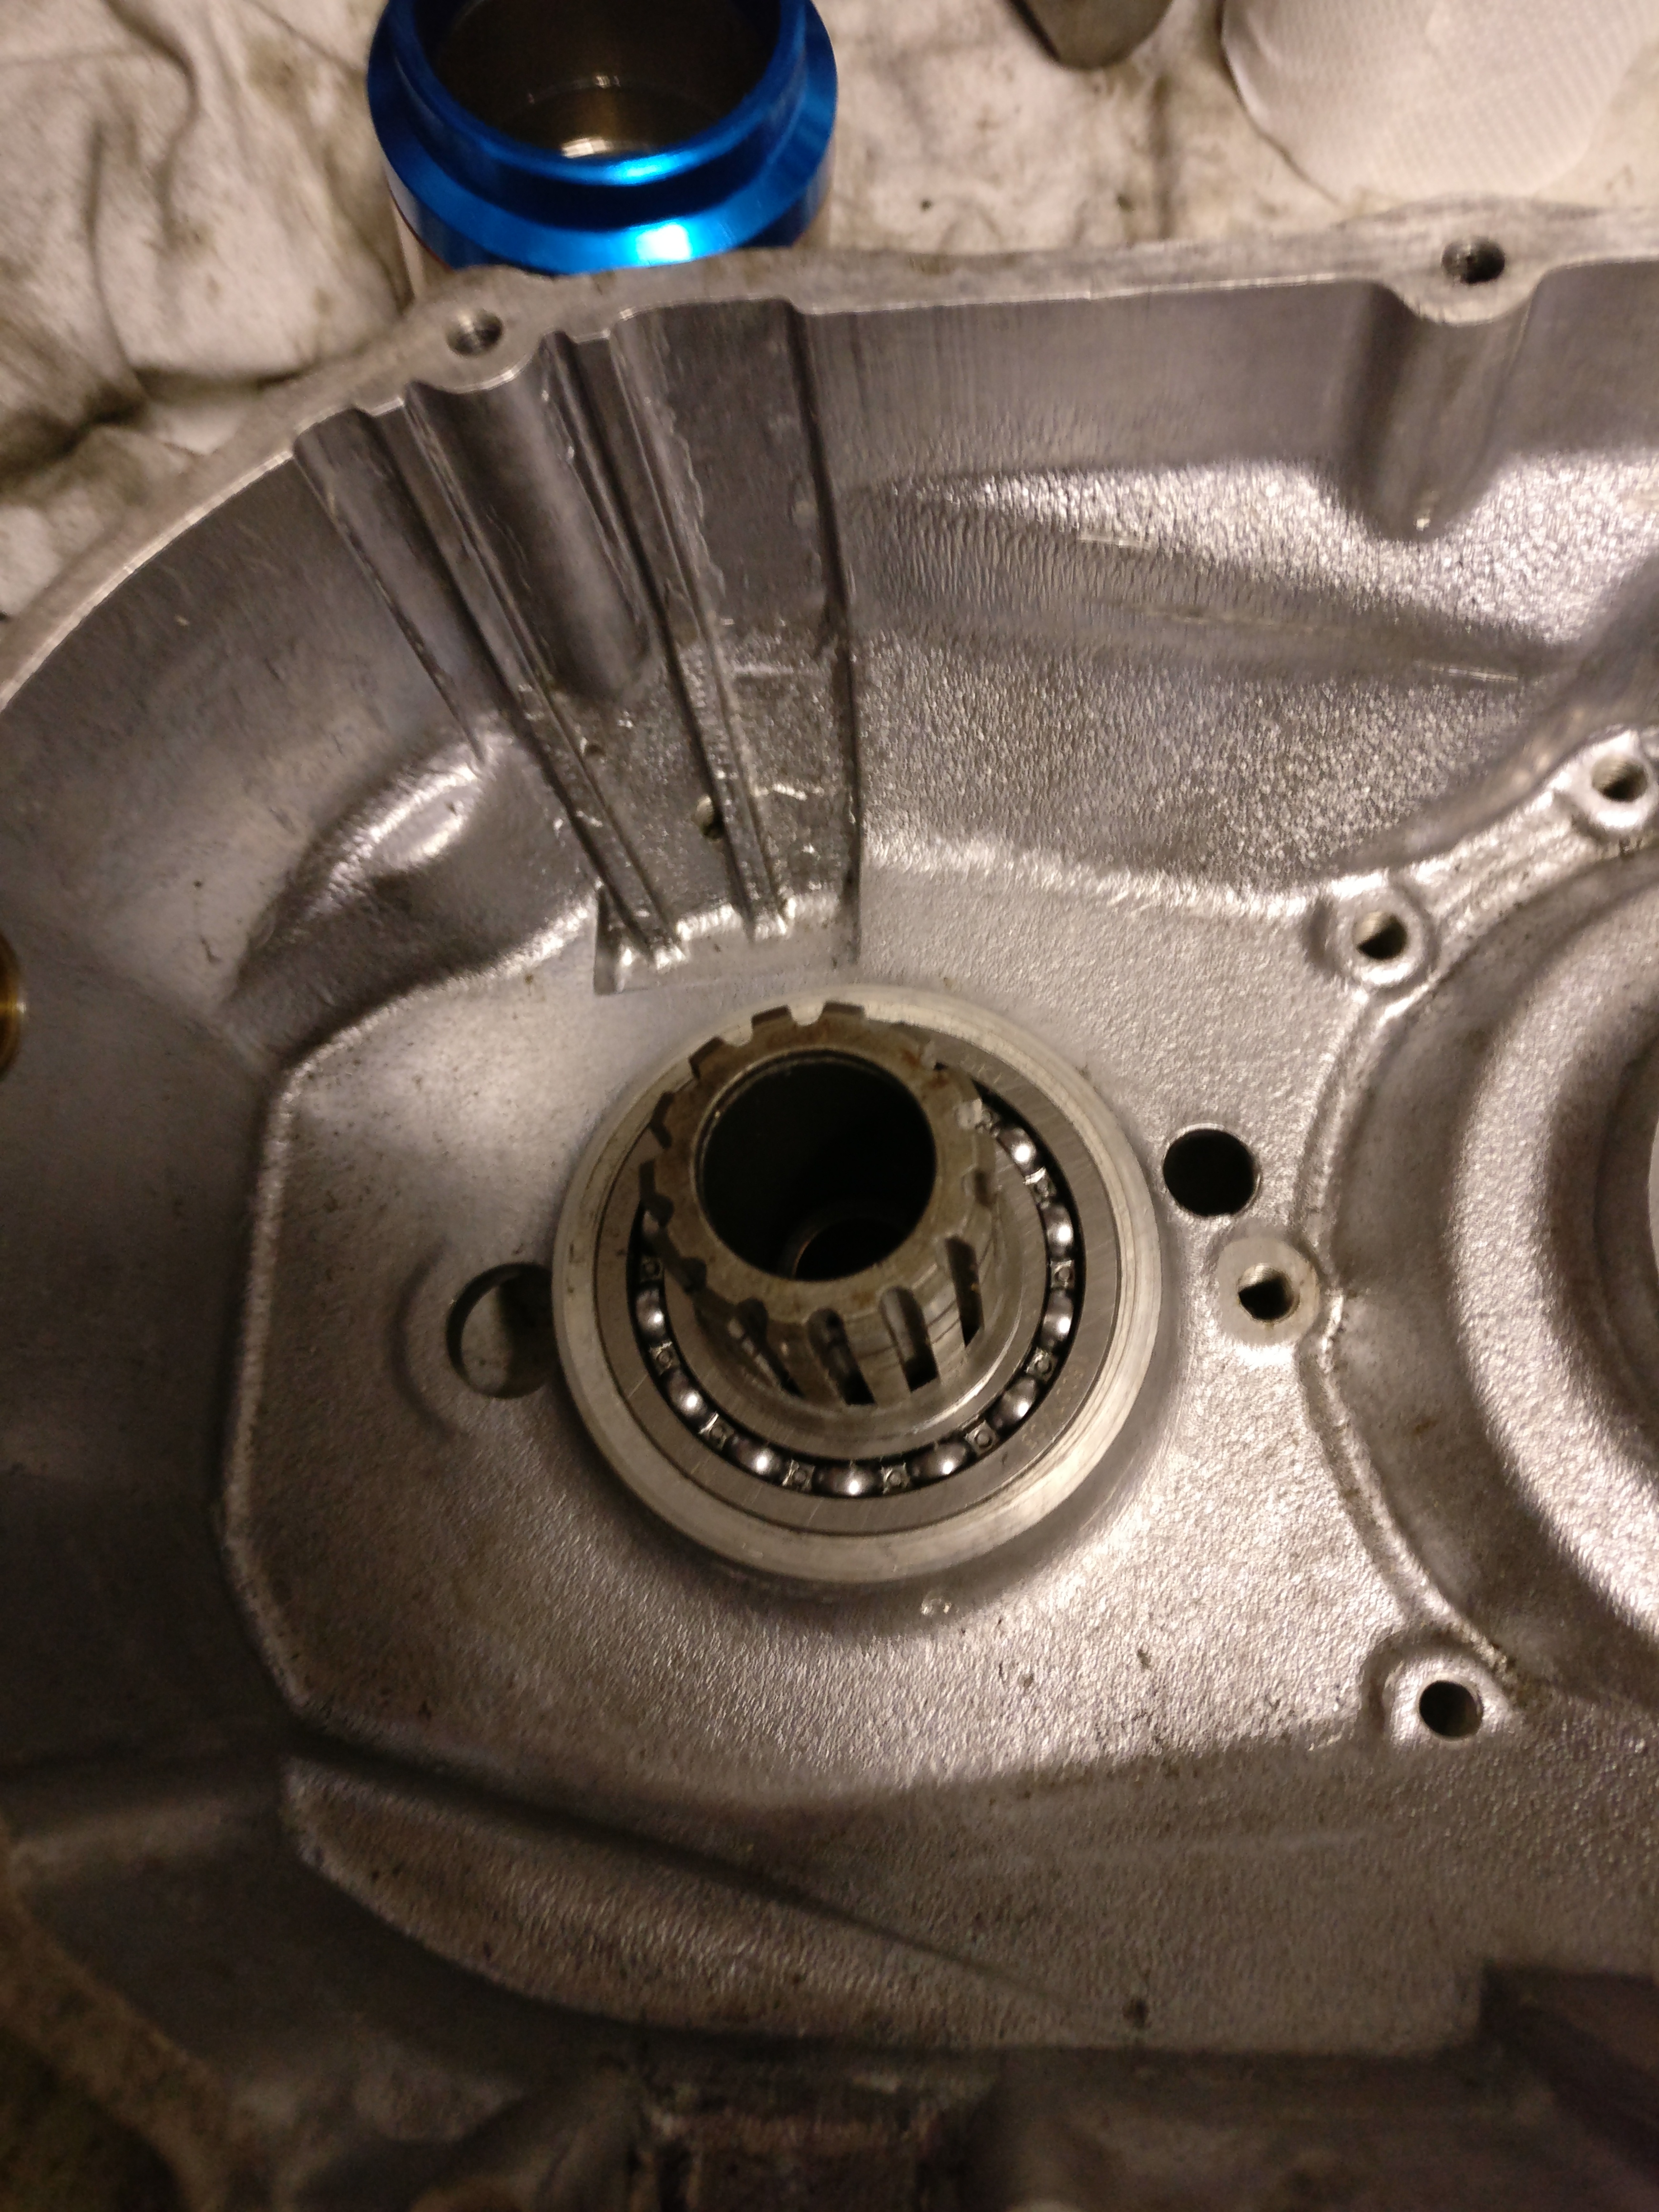
We also need to re-install the layshaft bearing cage. For good measure the ball bearings have been replaced:
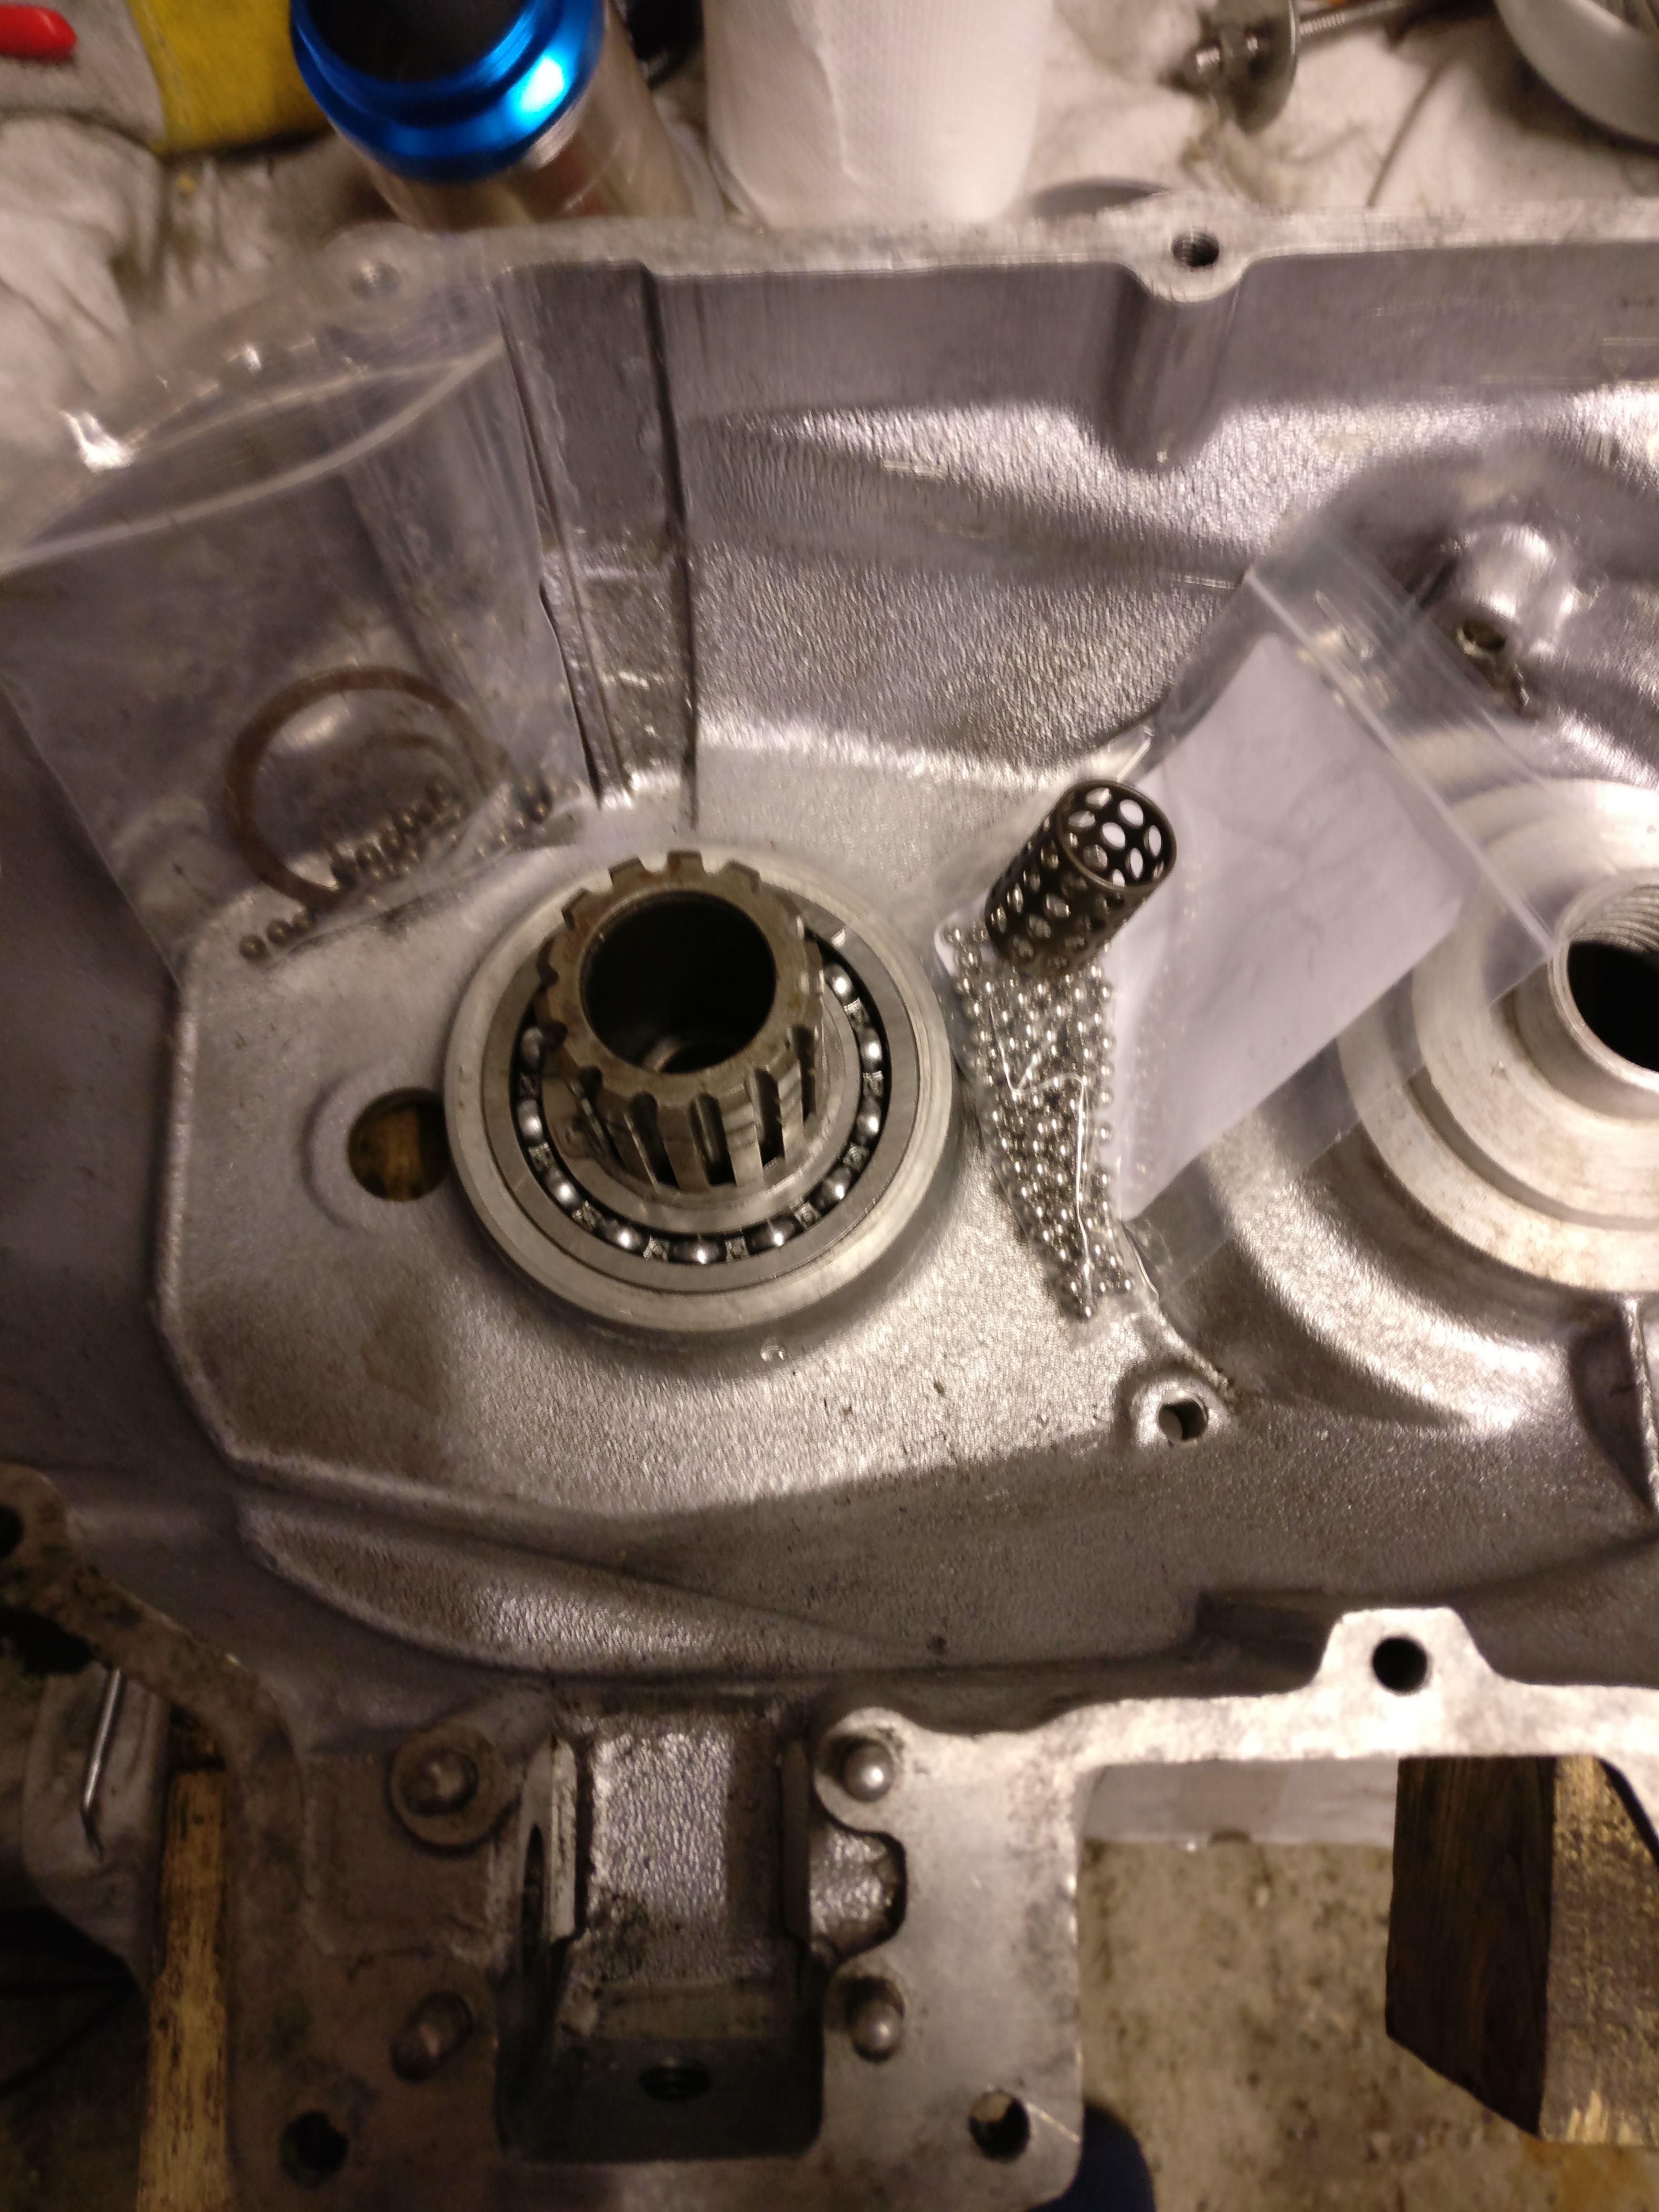
Bit of a tricky job as the ball bearings have a tendency to drop out, so my recipe is to use some wheel axle grease to stick the bottom two rows on and then put my finger inside to hold it up, carefully putting the remaining balls in. We put a seeger ring in to ensure the cage doesn’t come out.
Lay shaft
As per above the lay shaft needs replacing to fit the engine model. The other model will work, but there is a replacement at hand, courtesy chairman of the Zundapp Bella Enthusiasts Club, we’ll put this in. As you can see: one half hole, one through hole, two springs and 3 balls:


Gear stack
The moving gears were very badly worn so have been replaced (again courtesy of the Zundapp Bella Enthusiasts Club!)
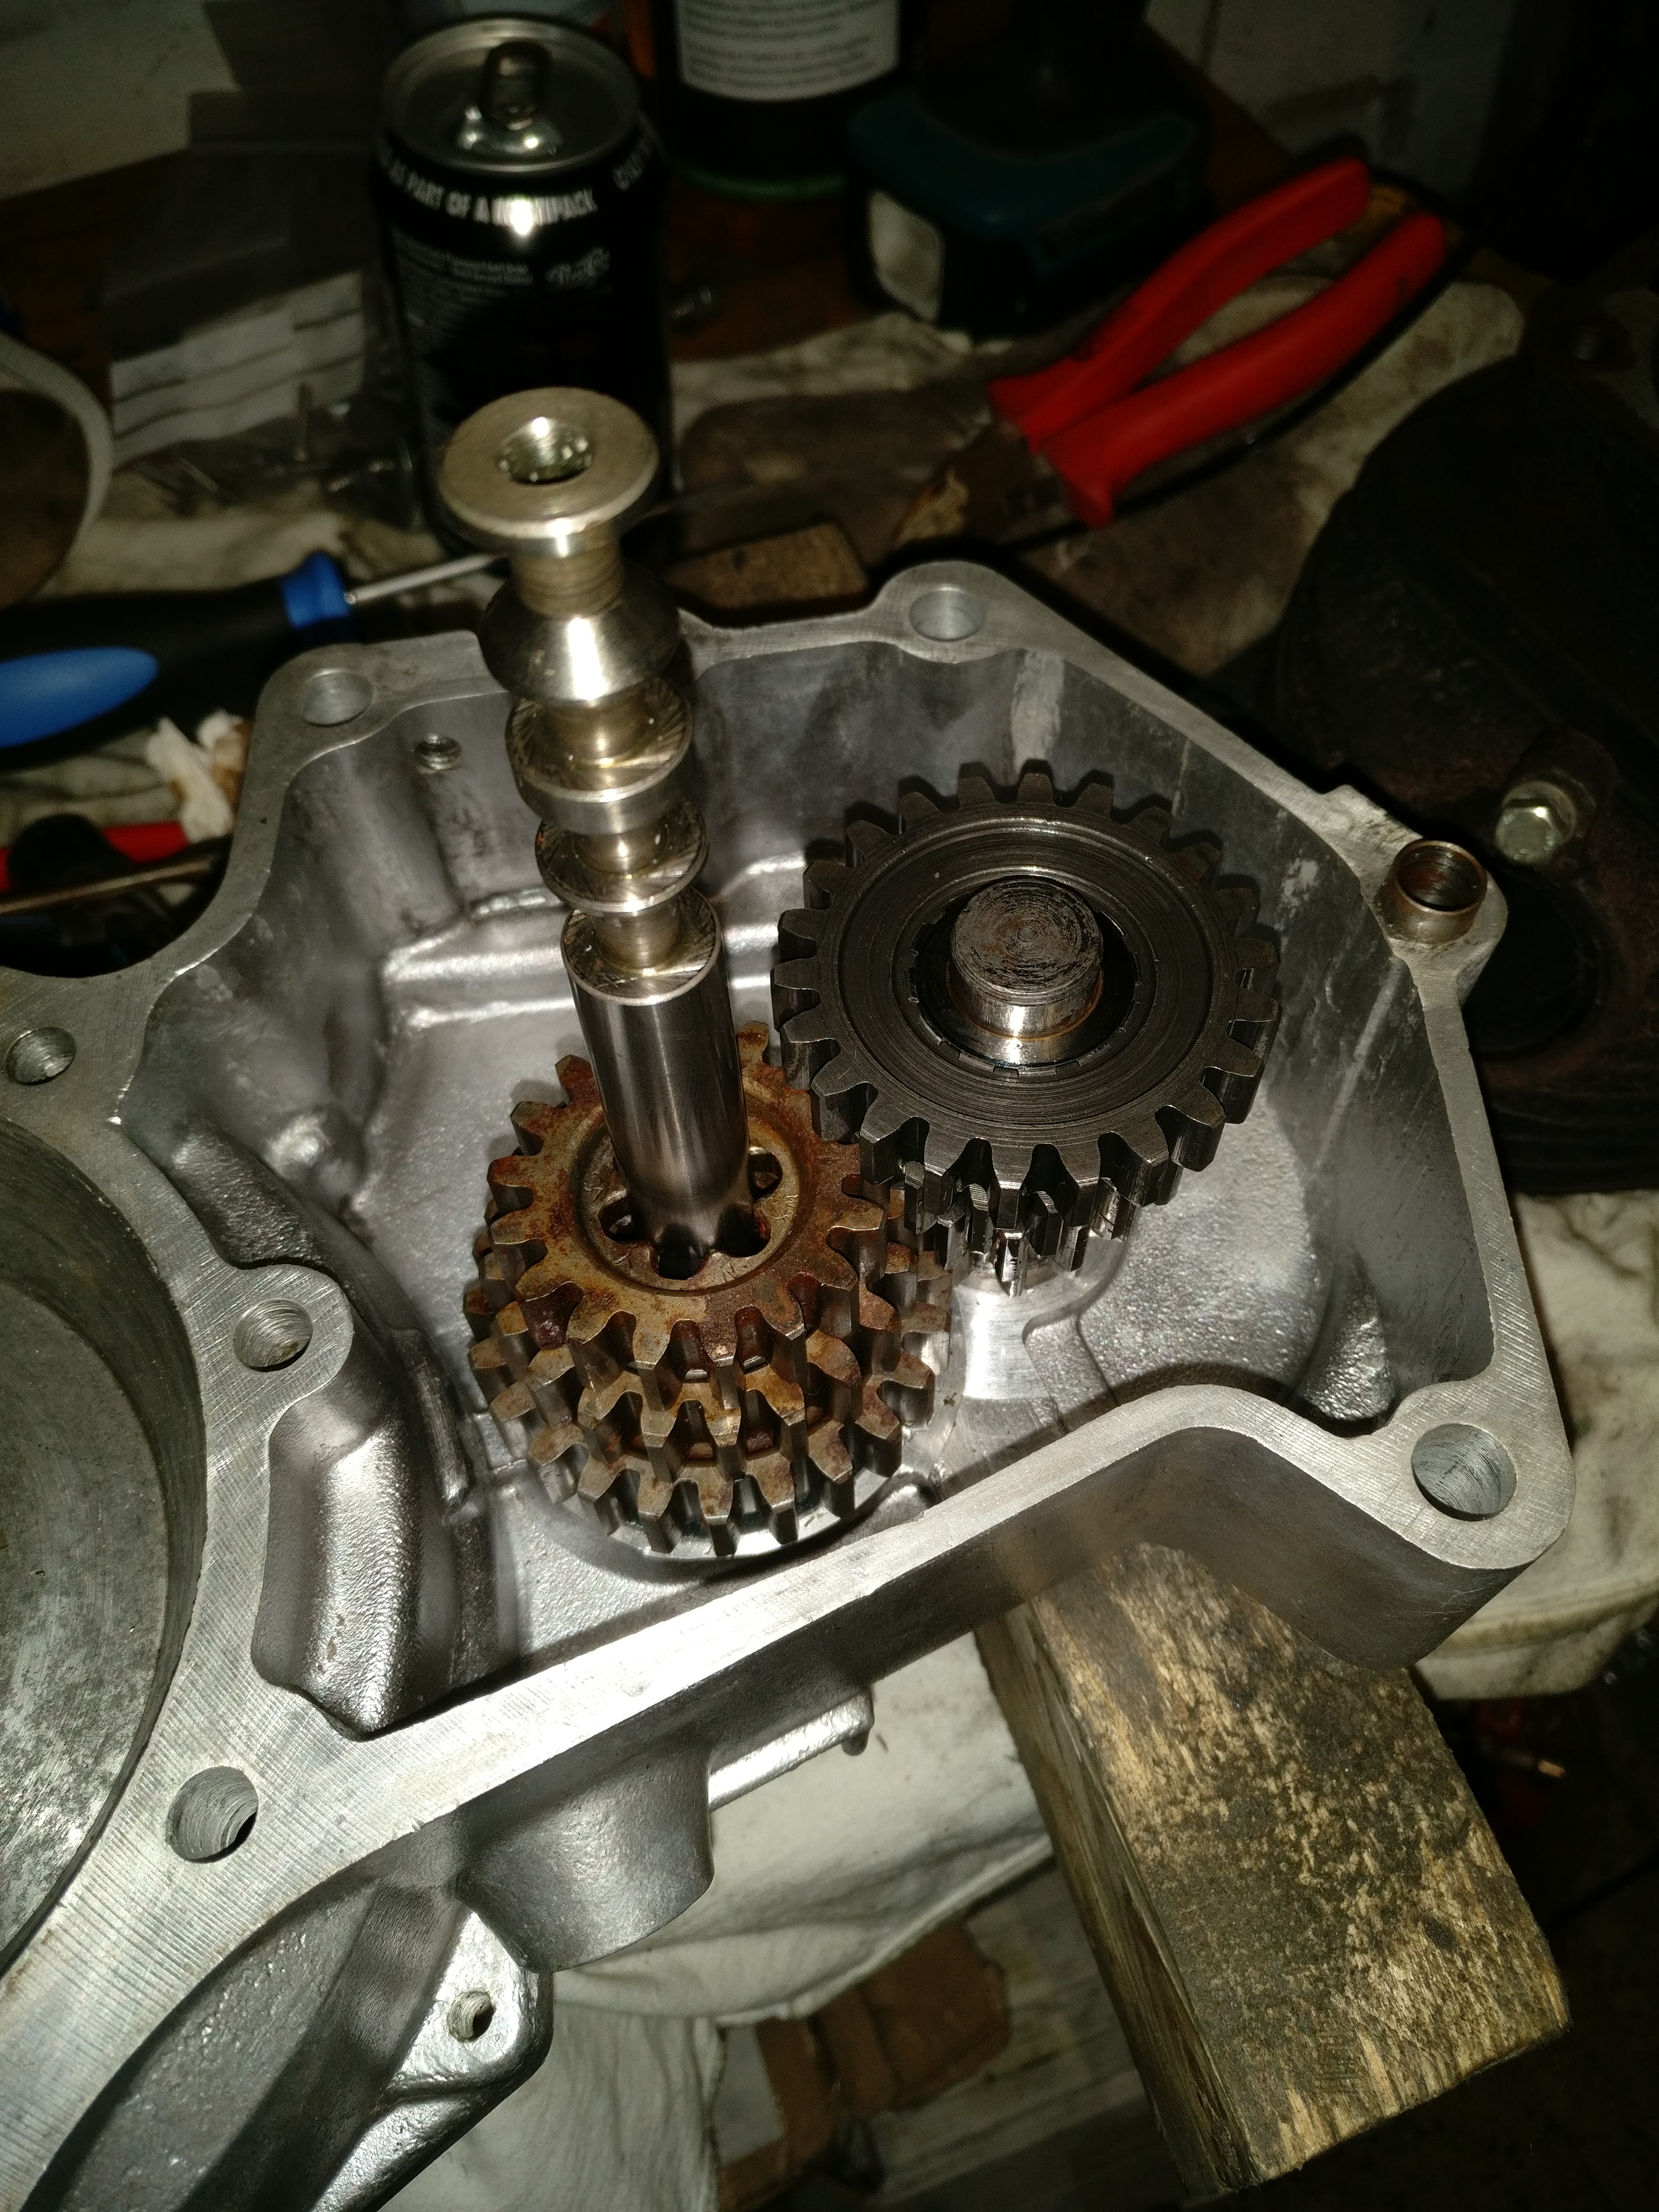
I compared the thickness of the original gears and the replacement ones and they are exactly the same; so no re-shimming needed for the moving gears.
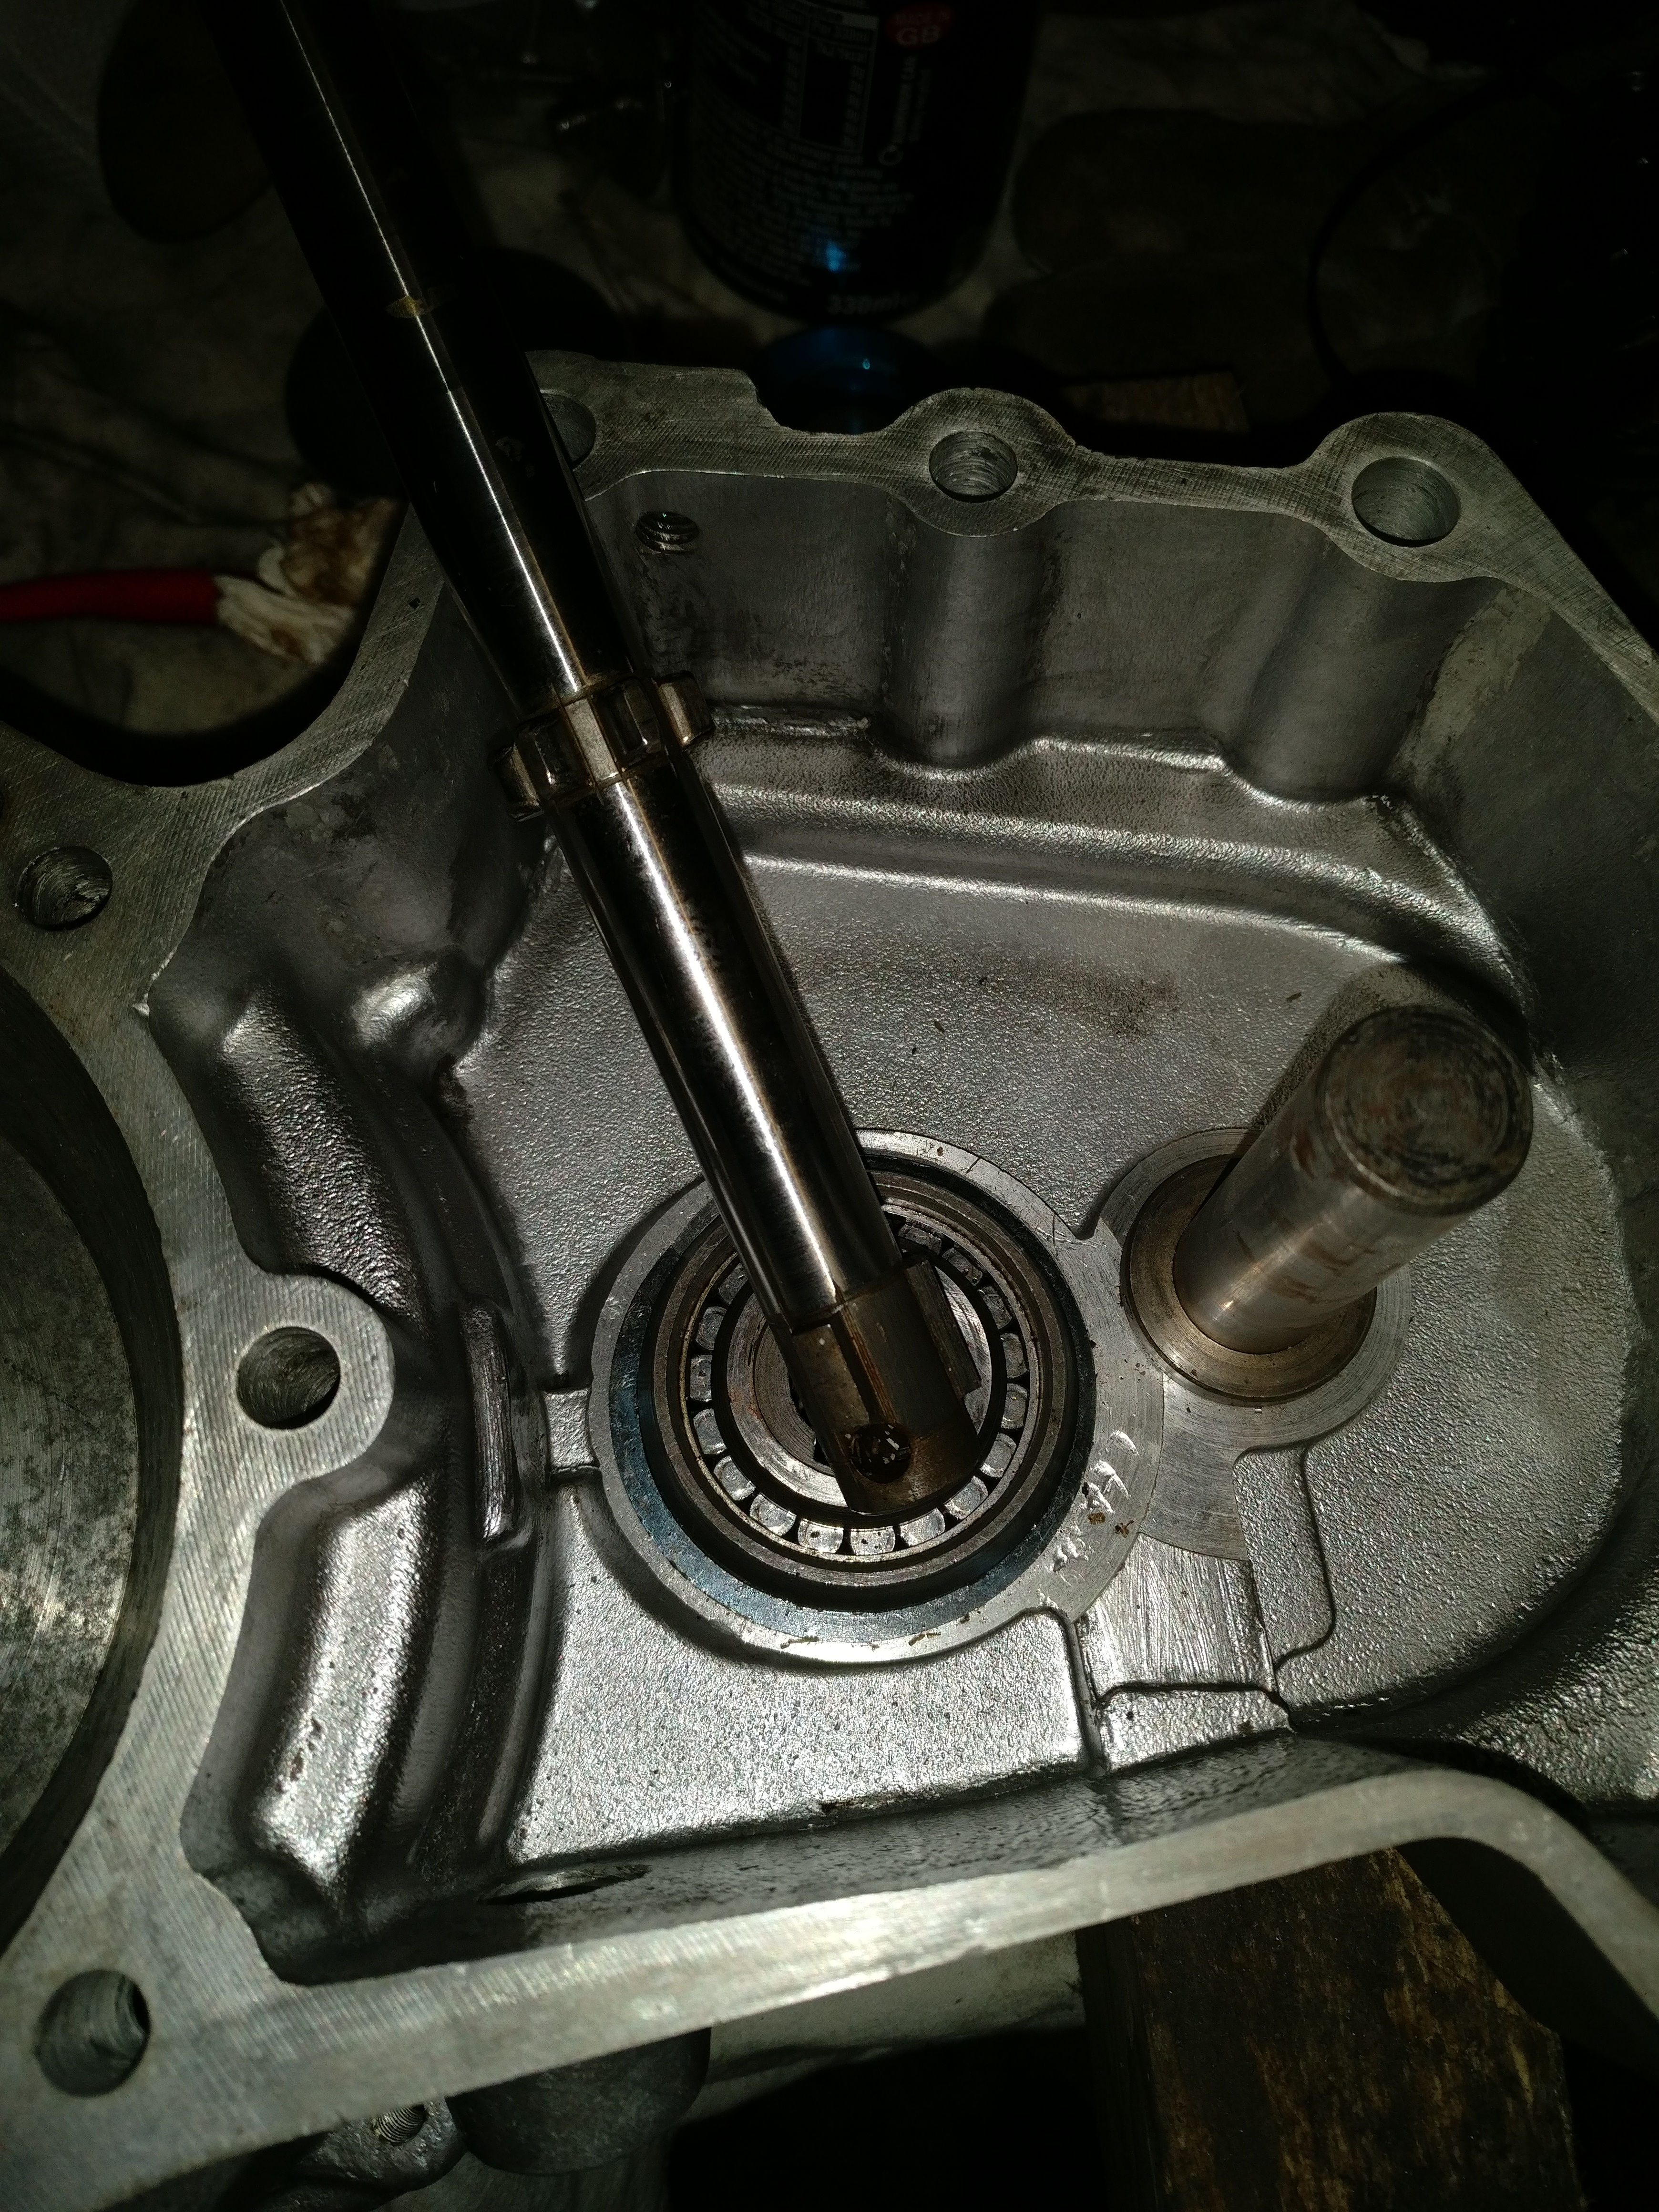
The fixed gear stack needs to have 0.2mm play axially, so just did a quick re-measurement to ensure this would work out:
Basically, just measure from case to ring shown and on the other case from case to top of stack. Play was 0.21mm, so perfect. This is with leaving the factory shims of 2×0.1mm bottom of stack and 1x 0.1 at the top. Again, great accuracy from the factory.
BIG WARNING: All the measurements below are on the basis of NOT using an engine casing gasket made of paper, but liquid gasket as per factory which is near 0 thickness. If used, the shimming needs to be increased to reflect the thickness of the gasket!
Final job for the day is too clean the casings, put the sealant on and close the case:
This it for today. Next jobs: oil seals.